Pages

Monday, September 11, 2023

Cinnamon Roll Cake


I woke up early yesterday and suddenly wanted to make a Cinnamon Roll Cake. And since I had a couple of hours before church, I did it. 

Cinnamon Roll Cake is a quick substitute for yeast-based cinnamon rolls, and it tastes FABULOUS. The basic cake recipe is nearly identical to the one we use for the Peach Right-Side-Up Cake, but the addition of a cinnamon swirl turns it from a plain vanilla cake to a much more enjoyable breakfast dessert. (Is that a thing? It should be a thing, right?) 


Cinnamon Roll Cake

1 tsp. xanthan gum
2 1/2 tsp. baking powder
1/2 tsp. salt
1 1/4 c. sugar
1 (3.4 oz.) pkg instant vanilla pudding mix
3/4 c. butter, softened but still cool
3 eggs + 1 egg yolk
1 1/2 tsp. vanilla
1 1/4 c. buttermilk (I usually combine 1 1/8 c. whole milk and 1/8 c. lemon juice and let it sit for about 5 minutes while I combine the rest of the ingredients) 

Cinnamon Swirl

3/4 c butter, slightly melted
1 c brown sugar
2 1/2 tsp cinnamon 

Cream Cheese Icing

2 oz cream cheese 
2 c powdered sugar
4-5 Tbs milk
1 tsp vanilla 

Preheat the oven to 350 degrees. Spray a 13x18 sheet cake pan with cooking spray. Remove the eggs and buttermilk from the fridge and let them sit at room temp for about half an hour. (In a hurry? Place your fridge-cold eggs in a bowl of warm water for five minutes or so and they’ll be much closer to room temp.) 

Combine all the dry cake ingredients in the bowl of a stand mixer. Add the butter and mix on low to medium speed until the mixture resembles a cake mix (the butter will be in very small crumbs. 


Add eggs, vanilla, and buttermilk to the dry ingredients. Mix on medium-low speed until mixture is smooth.


Spread cake batter evenly in the prepared pan. 

Combine all cinnamon swirl ingredients. Pour (or, if your mixture is too thick to pour, drop in small spoonfuls) on top of the cake batter. Use a knife to swirl the cinnamon mixture through the cake batter, leaving the batter as evenly spread as you can. 


Bake at 350 for 23-28 minutes or until the top of the cake is golden brown. Remove from oven. 

To make the glaze, beat cream cheese and powdered sugar until smooth. Add vanilla. Add milk 1 tablespoon at a time, pausing to scrape down the sides of the mixing bowl every once in a while. (Adding the milk slowly allows you to ensure that the glaze will be smooth and without lumps of cream cheese.)

Spoon the glaze over the top of the warm cake. Serve warm or cold.


Sunday, December 12, 2021

Gingerbread Cake


I love how versatile this sheet cake recipe has turned out. For the last few days I’ve been thinking I out what a “Christmas” flavored cake would be like and finally decided to try a gingerbread flavored cake. The flavor turned out lovely - gingerbready without being overpowering. The texture was soft and airy, like the rest of these “Texas Sheet Cakes.” We topped it with powdered sugar and stabilized whipped cream, and it was really hard to stop with just one piece! 


Gingerbread Texas Sheet Cake

2 c. EGF all-purpose flour

2 c. Brown sugar

1 tsp. xanthan gum

1 tsp. baking soda

1 1/2 tsp cinnamon

1 1/2 tsp ginger

1/4 tsp cloves

1/2 tsp. salt

1 c. butter (2 sticks)

1/4 c molasses

3/4 c. water

1/2 c. buttermilk (I use 1/2 c. whole milk plus about 1.5 tsp. lemon juice)

3 eggs

1 tsp. vanilla


In a large bowl, combine flour mix, sugar, xanthan gum, baking soda, spices, and salt. In a medium pan, combine butter, molasses, and water. Bring to a boil over medium high heat, stirring occasionally. Pour butter mixture into flour mixture and mix well until smooth. Add buttermilk, eggs, and vanilla and mix thoroughly. The batter will be quite thin.

Pour batter into a greased (or well-sprayed-with-Pam) 13x18 sheet cake pan. Bake at 400 degrees for 20-25 minutes. (The edges of the cake will pull away from the pan when the cake is done.) Remove from the oven and cool thoroughly. Dust with powdered sugar. Serve with stabilized whipped cream. 

Thursday, March 25, 2021

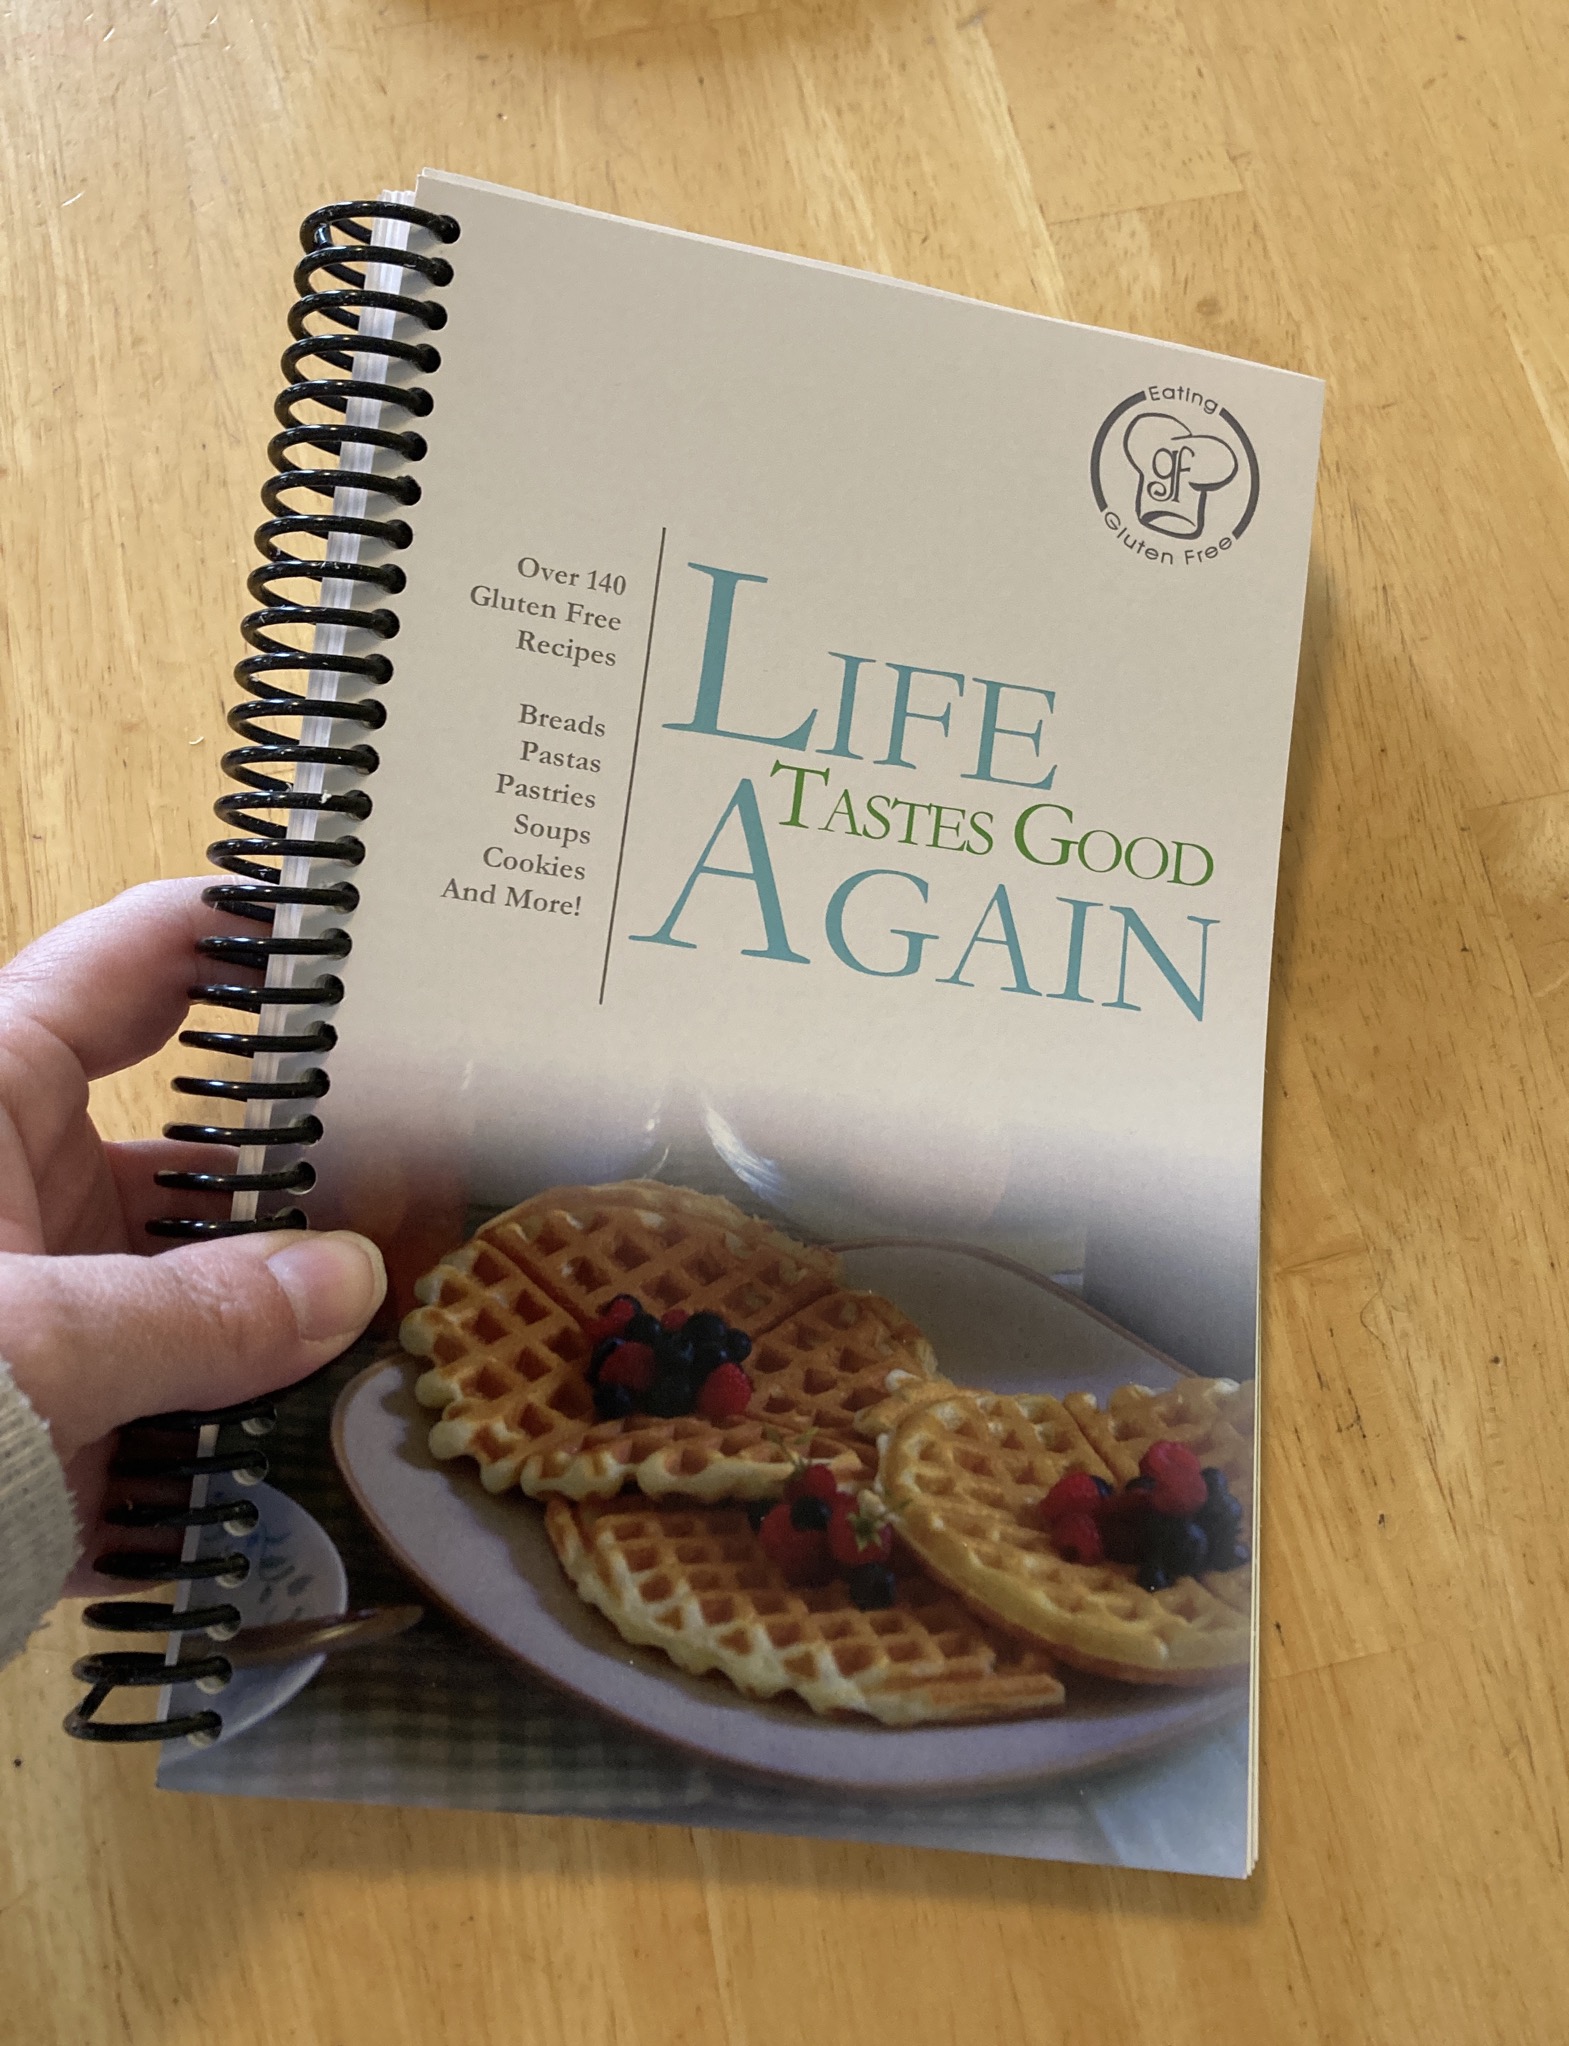
Cookbook reprints available!


Several years ago we started to run low on our cookbooks, so I contacted the printer to see about ordering more of them. Unfortunately, they had lost our files in a server crash. I spent quite a long time working on the recipe files, only to be completely thrown for a loop by the missing covers. So I sat and stared at my computer, wondering how to recreate the covers and inserts. For two years. 

Yes, it took me two years to recreate the covers and inserts. Could have been worse, though...I swear I have had clean laundry piles hanging over my head for that long. (OK, that is perhaps a slight exaggeration about the laundry. Perhaps.) 

Anyway, I finally decided to just do SOMETHING and print it. So, if you are looking for a new copy of our first cookbook (with a much more helpful index), they are now available! 

If you are in the Utah Valley area, you can purchase one through Kate’s GF Kitchen and pick it up today right away. If you need it mailed, visit eatingglutenfree.com’s products page. (They will be available for pickup starting today, but won’t be available to ship for another few weeks.) 


Look at that helpful index! (That took me DAYS to create!) Also, can you see the way the light shines off the pages? (It’s most noticeable up by the M section). We had it printed on heavy paper that’s a little bit slick to the touch, which should help it to be more liquid resistant.


Saturday, November 14, 2020

Gluten Free Spudnuts!!


 So, you may not know this, but spudnuts are the best kind of doughnuts ever invented. They are So Good. I mean, Krispy Kreme are decent, but Spudnuts are stellar. I have, in the past, tried to make raised yeast-style gluten free doughnuts, but I have never actually liked the results. (This explains why the only doughnut recipe on this site is a cake doughnut.) Well, this morning I woke up thinking about Spudnuts and wanting to find a way to make them gluten free. 

To make a (quite) long story short, I compared recipes, realized that the Six Sister’s Spudnut recipe was actually very similar to my favorite gluten free bread recipe, and decided to combine them and make gluten free Spudnuts. 

They turned out beautifully. The dough was super easy to work with, they fried up a beautiful golden brown, and the taste and texture were great. They aren’t exactly like the raised-glazed doughnuts sold by The Spudnut Shop in my hometown, but they’re certainly the best gluten free yeast doughnuts I’ve ever had. (And when I shared one with my spudnut loving neighbor he said “But these are gluten free? Nuh-uh!” Success :) 

My only regret is that I only made a single batch (about a dozen doughnuts). I was afraid they wouldn’t turn out well and that I would regret wasting the flour. Instead they were fabulous and all my children complained that they couldn’t eat more. 


Look how light and chewy they are! 

Try them! And let me know if you like them as much as we did! 


Gluten Free Spudnut Recipe

1/4 c potato water*

3/4 c milk 

1/4 c mashed potatoes*

1/4 c sugar

3/4 tsp salt

1/4 c oil

3/4 tsp vanilla

1/2 TBS yeast 

2 eggs

3 c EGF All-Purpose flour mix

2 tsp Xanthan gum 

1/4 tsp baking soda

1/4 tsp baking powder


*The initial step in making Spudnuts is to take a medium potato, peel it, dice it into small cubes, and boil it until the potato cubes are soft (just as you would to make mashed potatoes). Quarter inch cubes need to be boiled for about ten minutes, while one inch cubes can take 20 minutes or more. Once the potatoes are soft, drain off the water (reserving 1/4 cup of that hot water for the donuts). Mash the boiled potatoes until smooth. Now you’re ready to start making the Spudnut dough. 


Mix together potato water and milk. If necessary, microwave for about twenty seconds or so to get the liquid to 100° to 110°. (This is just the right temperature to activate the yeast without killing it. I prefer to linger right around 100°.) Combine the milk/water mixture with the mashed potatoes, sugar, salt, oil, and vanilla. Add yeast and mix well. Let sit until yeast starts foaming and is fully dissolved. (If you are using regular active yeast, let sit until the yeast is fully dissolved and starting to bubble - about 30 minutes. If using instant yeast, the time needed to dissolve and activate the yeast is much shorter, maybe 10 minutes.) While waiting for the yeast to start foaming, combine flour mix, xanthan gum, baking powder, and baking soda. 

Once the yeast has begun foaming, add beaten eggs and flour mixture to the yeast mixture. Mix well. Once the dough is thoroughly combined, scrape the dough into a ball, then cover with lightly oiled plastic wrap and allow the dough to rise until doubled (about 1 hour).**

This dough is slightly stiffer than many gluten free bread doughs, and is quite easy to handle (I tried to post a video of it, but blogger seemed unable). (I’m kind of thinking I may try adding potatoes to my bread recipe next time....) 

Stir down the dough. Turn dough out onto a piece of parchment paper that has been well dusted with potato starch. Use the back of a spatula (also dipped in potato starch) to press the dough out evenly (about 1/3-1/2 inch thick). (Use enough potato starch to keep the dough from sticking, but don’t go crazy with it - adding too much starch can make the doughnuts drier.) 


Use a cookie cutter or cup dipped in potato starch to cut out doughnuts. Use a smaller cookie cutter to cut a hole in the center of each doughnut. (I didn’t have a cutter of the right size to cut out the centers, so we cut the top off a small Gatorade bottle and used that.)  


Combine any scraps of dough and cut out more doughnuts until all the dough has been used up (we got 13 doughnuts). 

Transfer cut doughnuts (and holes) to another parchment paper-lined cookie sheet. Gently cover with plastic wrap and allow to rise until doubled (about 30 minutes). (By the way, it really is important to let the dough raise fully both times. It’s tempting to cut the time short because you just want to eat them already, but letting them raise completely is what gives them their lighter, softer texture. Don’t shortchange yourself by not allowing the dough to raise properly!)

Heat vegetable oil to 350°. Transfer doughnuts gently into the hot oil and fry until golden brown (1-2 minutes). Turn doughnuts over to cook the other side.  


(Fry one or four at a time, depending on the size of the pan😄). Remove cooked doughnuts from oil and drain on paper towels. Dip slightly cooled doughnuts in glaze (see recipe below) and place glazed-side-up on parchment paper to cool (I reused the parchment paper the doughnuts had been raising on.) 


Enjoy! 


**Want to have hot doughnuts in the morning, but not to wake up at 5 am to start making them? Make the dough the night before and let it rise in the refrigerator overnight. Pull it out in the morning to warm up and finish rising before finishing them. You can probably even place cut out doughnuts in the fridge to rise, so all you would need to do is fry them in the morning...I haven’t tried it myself yet, though, so if one of you tries it, let me know in the comments how it worked. 


Vanilla Glaze Recipe (modified from Six Sisters) 

2 Tbs very hot water

1 c powdered sugar

1 Tbs butter

1 tsp vanilla 


Combine all ingredients and mix well. Makes just enough glaze for a single recipe of doughnuts and their holes. 


Wednesday, October 14, 2020

Homemade Tapioca Pudding


Tapioca pudding is one of those things that is NORMALLY gluten-free. Unfortunately, 2020 seems to have attacked minute tapioca along with toilet paper. There is NONE to be found. I have checked ALL of the stores, and online, and all of the places… There just is not any minute tapioca. So what is a mom of eight kids who all love tapioca pudding to do? 


Fortunately, there are still tapioca pearls available. Unfortunately, I have never actually made tapioca pudding with anything but Kraft minute tapioca. So I’ve had a little bit of a learning curve. The bag of small tapioca pearls I bought at a local Asian Foods market had no cooking instructions, so I had to search the internet for vague instructions. The first recipe I followed was not a success. It had me soak the tapioca in hot water for half an hour, but the proportions were not right and my soaked tapioca pearls formed a solid sheet across the bottom of my pan that took FOREVER to break up into smaller pieces again. The cooking process (post-soaking) also seemed to take forever. It was probably really only a few minutes more than the “minute” version, but it SEEMED longer because I had to take the pudding off the heat and temper the eggs before adding them back in ... lazy, I know, but it just felt like a lot of effort. And then, once the pudding was finished, my children objected to the flavor (“It just tastes like regular vanilla pudding!”) and the amount of tapioca pearls (“There’s so much tapioca...it’s stiff!”). 

So today I went back to the drawing board. I kept the pre-soaking step, but increased the water. Then I looked up the instructions for Krafts’ minute tapioca and based my recipe on their instructions. The recipe was simpler and faster, and my children agree the resultant pudding is “Much Better!” So, no matter what else 2020 takes from you, don’t let it take your tapioca pudding! 


Tapioca Pudding with Small Pearl Tapioca

1/3 c. small pearl tapioca
2/3 c. hot water
5 1/2 c. whole milk
2/3 c. sugar
Two eggs, beaten
Dash salt
1 to 2 teaspoons vanilla

In a large sauce pan, combine small pearl tapioca and hot water. Swirl around a bit to allow the tapioca to spread evenly across the bottom of the pan. Let sit for half an hour. After half an hour has passed, gently stir the tapioca to make sure it has not formed any large clumps. There will still be a little bit of water in the bottom of the pan. Do not remove the excess water. 

Add milk, sugar, salt, and beaten egg to the tapioca. Whisk well. Let sit for five minutes.

Heat the pudding mixture over medium heat, stirring constantly, until it comes to a full rolling boil. Remove from heat and stir in vanilla. Allow pudding to sit and cool for 20 minutes. Pudding will continue to thicken as it cools. (If desired, cover the pudding with plastic wrap to prevent it from forming a skin. I usually just give it a quick stir every few minutes instead.) 

If, for some reason, your pudding is not thickening after it has been cooling for ten minutes, return it to medium heat and bring it back to a boil, then allow it to cool. This should fix it. 

Serve warm or cold. Makes about ten 1/2 c servings. (If you want to cut the recipe in half, use 3 Tbs. tapioca pearls and 6 Tbs. hot water.) 


Thursday, October 1, 2020

Gluten Free Tomato Soup for Casseroles


 Tomato soup is one of those things I never eat on its own but which I use all the time anyway. Because so many casseroles call for tomato soup, this is one of those items that most people really miss after going gluten free. (Well, maybe not “most people”, but as a busy mother with a lot of children, I sure missed being able to buy it.) 

The good news is, tomato soup is really easy to make. Really easy. If you just adore sitting down with a hot bowl of tomato soup, this may not be exactly what you are looking for.  It is, instead, a thicker, casserole ready, almost condensed soup...so Shepherd’s Pie gets to stay on your menu :)


Tomato Soup

1/4 cup butter

1/4 cup EGF all purpose flour mix

1 tsp beef bouillon

1 (15 ounce) can tomato sauce

1 c milk 

Salt and pepper to taste

Basil leaves, oregano, and dill weed to taste


Combine butter and flour mix in a medium sauce pan. Add bouillon and spices. Heat over medium high heat until melted and well combined, whisking constantly. Add milk and tomato sauce. Cook and stir until thickened and bubbling. Use in your favorite casserole. (Makes about 2 cans-worth of tomato soup.) 

(In the picture above, I’ve combine a recipe of this tomato soup with 2 c cooked hamburger, and I’m about to top it with green beans, mashed potatoes, and cheese, a favorite busy-fall-day dinner at our house.) 

Tuesday, September 29, 2020

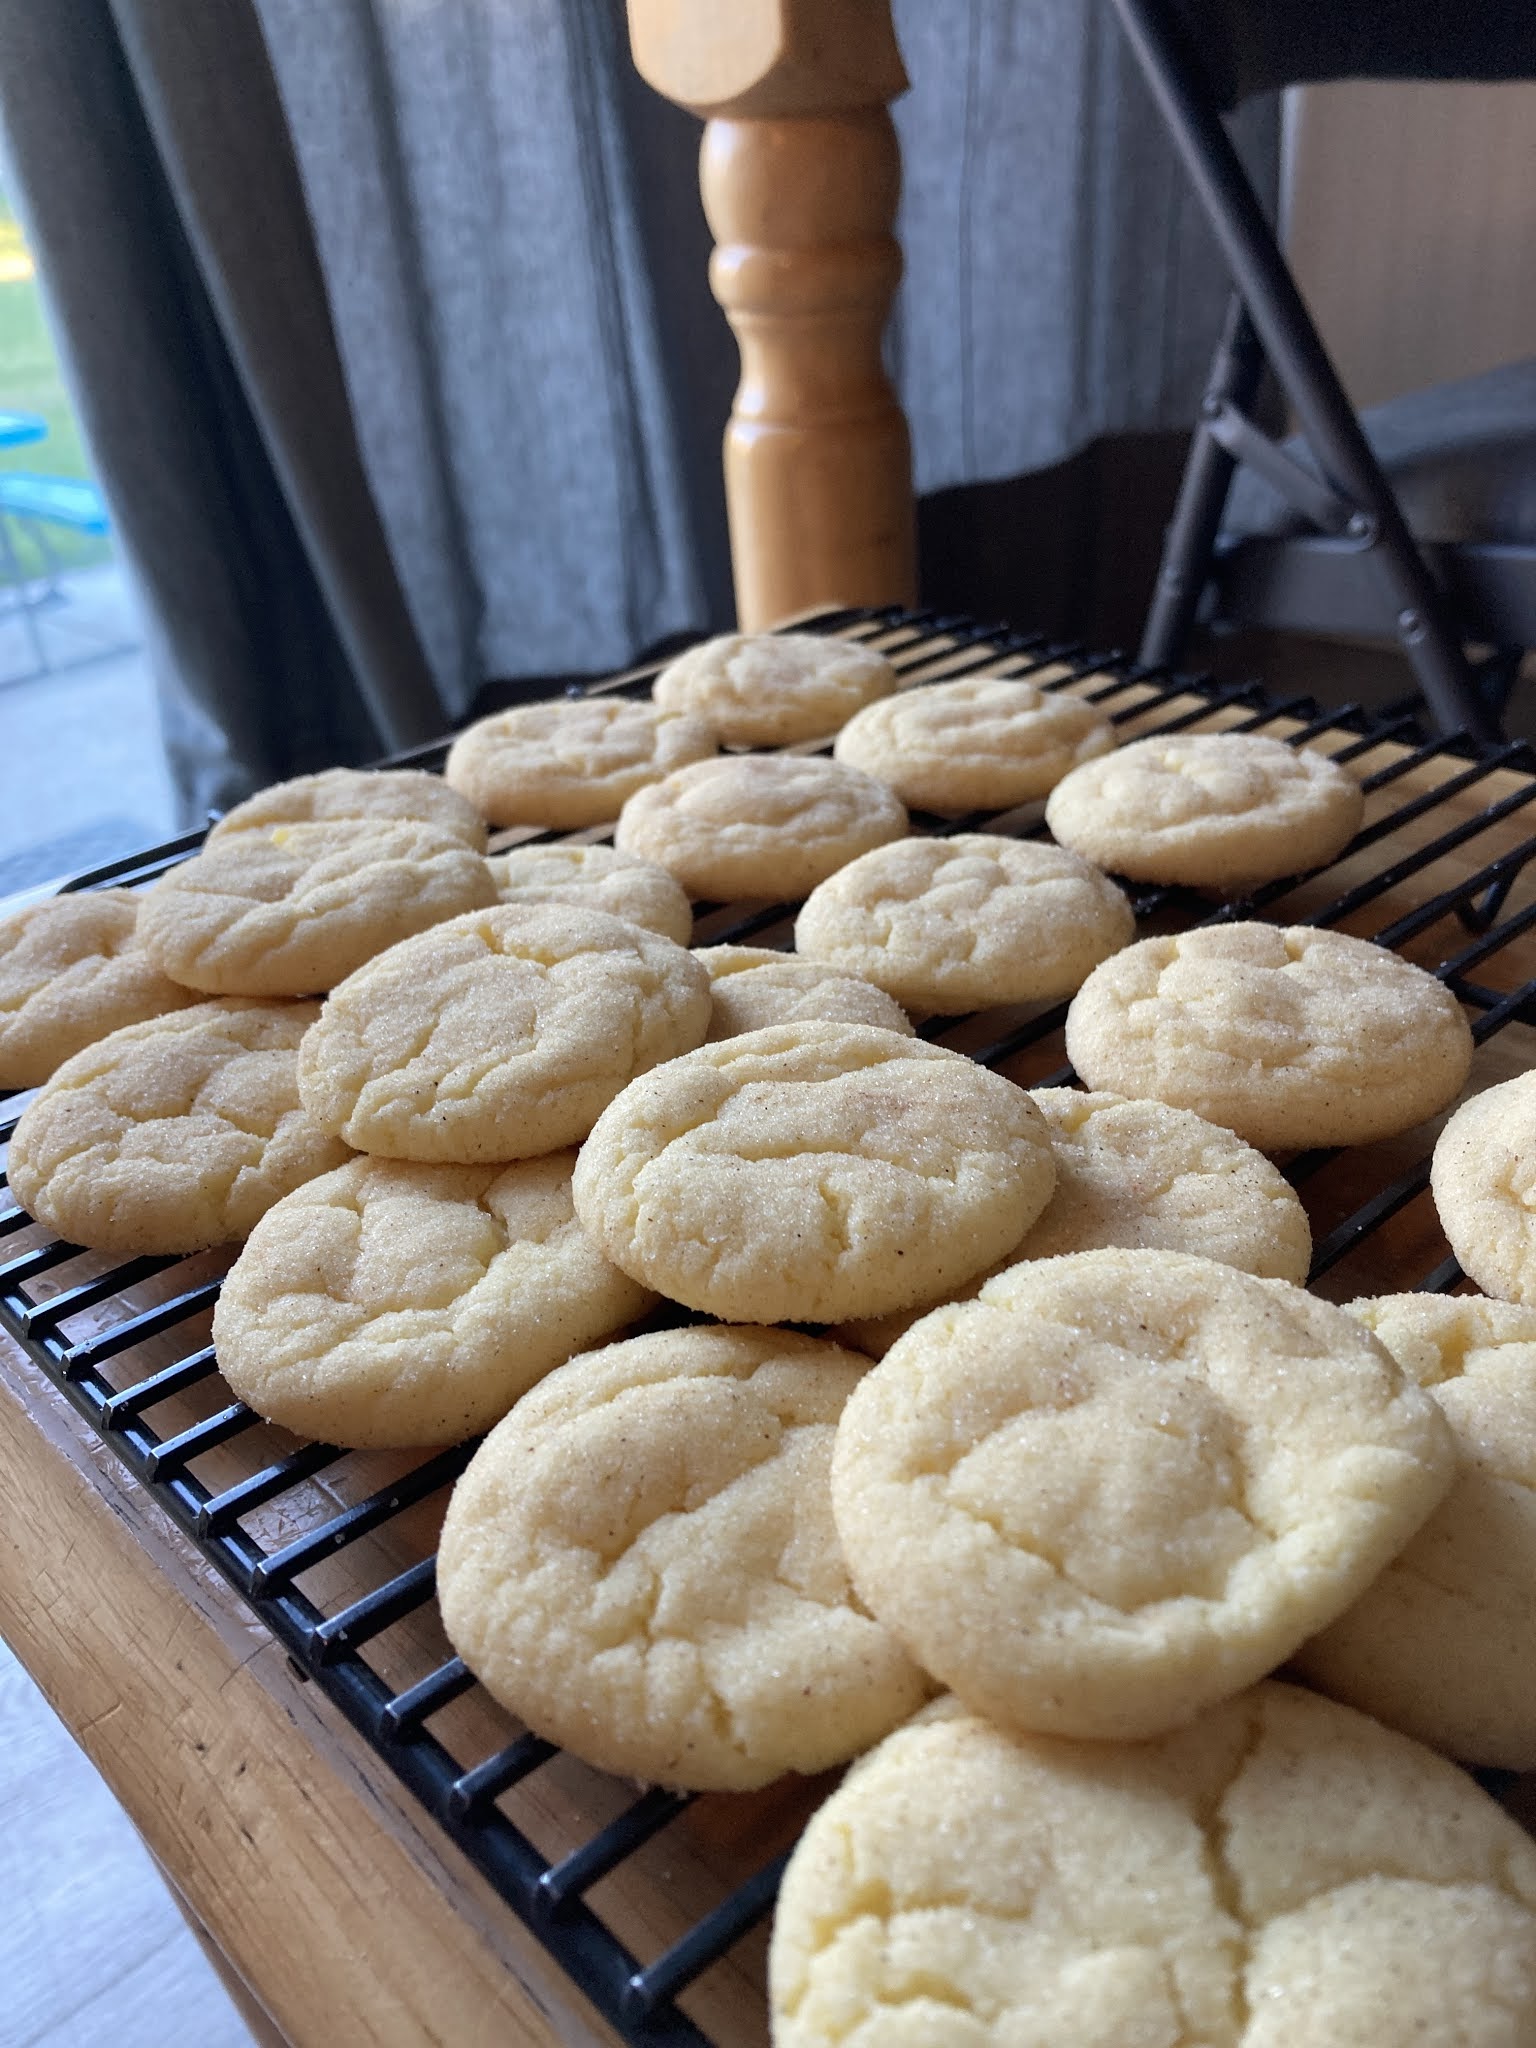
Gluten Free Snickerdoodles


To be completely honest with you, I don’t really care for snickerdoodles. My husband really likes them, so I developed a recipe several years ago…but I really haven’t made it more than a couple of times since then. Today one of my twins decided that she would make snickerdoodles for one of her church youth leaders who had to have surgery. Other than asking me “How do you know when it’s creamed?”, she made them all by herself. So far I’ve eaten two, and I may eat a third. Maybe I have COVID and my sense of taste has gone, but they just taste so GOOD. And the little boy whose hand is in the next picture? I think he’s eaten five. We may have to make a second batch. 


Gluten Free Snickerdoodles

1 c. butter flavored shortening
1 c. sugar
1 (3.4 ounce) package instant vanilla pudding mix
2 eggs
1 1/3 tsp. xanthan gum
1 tsp. baking soda
1/4 tsp. salt
2 tsp. cream of tartar
Cinnamon sugar for rolling**

Preheat oven to 350°.

Cream shortening, sugar, and dry pudding mix. Add eggs and mix well. Combine dry ingredients, then mix them into the creamed mixture.

Rolled into 1 inch balls. Roll balls in cinnamon sugar. Place 2 inches apart on an ungreased cookie sheet. (Or, if you like, place them on a cookie sheet lined with parchment paper.)

Bake 10 to 11 minutes. (Bottom edges will be a light golden brown. Cookies will be puffed up a little bit, but not completely firm to the touch. They should fall a little bit after they come out of the oven.)

**To make cinnamon sugar, combine 1 c. white sugar with 1 tsp. cinnamon and mix well. Or, if you like your cinnamon flavor a little bit stronger, add two or even 3 teaspoons cinnamon per cup of sugar.


Sunday, June 14, 2020

Lemonade Sheet Cake


Doesn’t this look like the perfect summertime dessert? 

It appears I am not done with my sheet cake variations. I asked my two year old what kind of cake he wanted for dessert tonight and he replied “Lemon!”  When asked what kind of frosting he wanted, the answer was “Pink!” So I took my Vanilla sheet cake recipe and turned it into a Pink Lemonade cake. I am especially proud of the frosting, which definitely tastes more “lemonade” than “lemon” to me. It’s not earth-shakingly new, but it is another successfully yummy variation on my gluten free sheet cake theme :)


Lemonade Sheet Cake

2 c. EGF all-purpose flour
2 c. sugar
1 tsp. xanthan gum
1 tsp. baking soda
1 tsp. lemon peel (I used dried peel because that’s what I had)
1/2 tsp. salt
1 c. butter (2 sticks)
1 c. water
1/2 c. buttermilk (I use 1/2 c. whole milk plus about 2 tsp. lemon juice)
2-4 Tbs lemon juice (I used about 2 Tbs, but think I will add more next time)
3 eggs
1 tsp. vanilla

In a large bowl, combine flour mix, sugar, xanthan gum, baking soda, salt, and lemon peel. In a medium pan, combine butter and water. Bring to a boil over medium high heat, stirring occasionally. Pour butter mixture into flour mixture and mix well until smooth. Add buttermilk, lemon juice, eggs, and vanilla and mix thoroughly. The batter will be quite thin.

Pour batter into a greased (or well-sprayed-with-Pam) 13x18 sheet cake pan. Bake at 400 degrees for 20-25 minutes. (The edges of the cake will pull away from the pan when the cake is done.) Remove from the oven and, while hot, top with the following frosting:

Lemonade Frosting

1/2 c. butter (1 stick)
5 c. powdered sugar (about 1 1/3 lb.)
3 Tbs sugar
3 Tbs lemon juice
3 Tbs. milk
1 tsp. vanilla

Combine sugar and lemon juice and stir well. Let sit (stirring occasionally) until sugar is fully dissolved. Once it is fully dissolved, pour 4 Tbs of the lemon juice mixture into a measuring cup (this is almost all of the juice).

Melt butter in a medium saucepan over medium-low heat, stirring continually, until butter is a very light brown color and aromatic. (If you burn the butter, don't use it. Throw it out and start again.)Turn heat down to low. Add powdered sugar to butter a cup or so at a time, stirring until well incorporated each time and adding sweetened lemon juice and then milk as necessary to keep the mixture mixable (about a tablespoon or two per cup of powdered sugar added). Remove from heat and add any remaining milk and the vanilla. (If you, like my two year old, want pink frosting, add food coloring here.) Mix well with a hand mixer or stand mixer until smooth (or, if the frosting is already very smooth (sifting the powdered sugar ahead of time will help with this), skip the mixer.

Pour immediately over warm cake (frosting will firm up quickly and spreads best while still hot).


Sunday, May 24, 2020

Gluten Free Yellow Cake


I’ve been on a cake making kick, evidently. A couple of weeks ago I decided to revamp the yellow cake recipe I’ve been using for a while. I’ve actually been a little disenchanted with it, even though I invented it myself. Recently it’s just seemed too…heavy. And the texture hasn’t been quite right. So I compared that recipe with the Vanilla Texas sheet cake that I’ve been making, and ended up with this recipe. Well, actually I ended up with a recipe that didn’t work quite as well as I wanted. So THIS time I decreased the buttermilk and it turned out beautifully. It’s not quite as tall as I’d like it to be, but that could probably be fixed by making a 1.5 times recipe and then baking it a little longer. I’ll let you know how it turns out after I try it :)

Gluten Free Yellow Cake

3/4 c. butter, softened
1.5 c. sugar
3 eggs
2 c. EGF all-purpose flour
1 tsp. xanthan gum
2 tsp. baking powder
1/2 tsp. salt
1 c. buttermilk (I use just under 1 c. whole milk plus about 2-3 tsp. lemon juice; don’t go crazy, though, or you’ll end up with a lemon cake)
1 tsp. vanilla

Preheat oven to 375°. Prepare a 9 x 13 pan (either by spraying it with nonstick cooking spray or by lining it with parchment paper).

Combine butter and sugar in a stand mixer. Beat on medium to high speed until light and fluffy. Add eggs and mix well. Combine dry ingredients in a separate bowl. Combine buttermilk and vanilla. Alternately add flour mixture and buttermilk to the creamed butter mixture, starting and ending with flour and mixing on low to medium speed after each addition until well incorporated. (Don’t go too overboard on the mixing, though. Because we are working with gluten free flours, the cake won’t get tough, but if you incorporated too much air into the cake batter the lack of gluten means the flour has a harder time keeping its structure around the air bubbles and then you’re more likely to get a collapsed cake. And NOBODY wants one of those.)

Pour batter into the prepared pan. Place in the preheated oven and bake for about 35 minutes (maybe a little less, maybe a little more). The cake will be pulling away from the edges of the pan and the top will spring back when gently touched. (Also a toothpick inserted in the center will come out clean. You know the drill.) Remove from oven and cool completely before frosting.


Before frosting - can you tell how the edges have pulled inward a bit? 

I frosted mine with a recipe of Lemon Buttercream Frosting that I found on Sally’s Baking Addiction. I did add  an extra couple of tablespoons of fresh lemon juice because the lemon flavor wasn’t quite strong enough for my taste. Altogether the cake was just delightful - the taste and texture were just like a homemade cake made with regular flour - and super easy to make. I’m excited to try it as the cake part of my Peach Right Side Up Cake, too!

The color is not quite right on this picture as it was taken inside, but you can see how cleanly it cut and how beautiful the texture was. 


Sunday, May 17, 2020

Peanut Butter Sheet Cake


So, it turns out I really like these sheet cakes. I’ve done chocolate, vanilla, and caramel sheet cakes, and today I decided to try a peanut butter version. I’m not sure what it is that helps these particular gluten free cakes to be so soft and light (I suspect the boiling water), but they’ve just been delicious. This peanut butter cake was no exception. Everyone liked it, even my daughter’s college roommate who, as a general rule, doesn’t like peanut butter things. Give it a try and tell me what you think!

Peanut Butter Texas Sheet Cake

2 c. EGF all-purpose flour
2 c. sugar
1 tsp. xanthan gum
1 tsp. baking soda
1/2 tsp. salt
1/2 c. butter (1 stick)
1/2 c. creamy peanut butter
1 Tbs oil
1 c. water
1/2 c. buttermilk (I use 1/2 c. whole milk plus about 1.5 tsp. lemon juice)
3 eggs
1 tsp. vanilla

In a large bowl, combine flour mix, sugar, xanthan gum, baking soda, and salt. In a medium pan, combine butter, peanut butter, oil, and water. Bring to a boil over medium high heat, stirring regularly. (Don’t worry if the peanut butter mixture starts to look separated - it will all mix in well in the end). Pour peanut butter mixture into flour mixture and mix well until smooth. Add buttermilk, eggs, and vanilla and mix thoroughly. The batter will be thin.

Pour batter into a greased (or well-sprayed-with-Pam or parchment-paper-lined) 13x18 sheet cake pan. Bake at 400 degrees for 20-25 minutes. (The edges of the cake will start to pull away from the pan when the cake is done, and the center of the cake will bounce back if gently touched (don’t burn yourself!).) Remove from the oven and, while hot, top with the following frosting:

Peanut Butter Frosting

1/2 c. butter (1 stick)
1/2 c. peanut butter (creamy or crunchy)
3 1/3 c. powdered sugar (just under 1 lb.)
6-7 Tbs. milk
1 tsp. vanilla

Place powdered sugar in the bow of a stand mixer. Combine butter, peanut butter, and milk in a medium saucepan over medium-high heat, stirring continually, until mixture starts boiling.  (Again, don’t worry if the mixture separates some.) Turn the mixer on low and slowly pour the hot peanut butter mixture into the powdered sugar while the mixer is running.  Mix on medium speed until the powdered sugar is well-incorporated and the icing is smooth, then add the vanilla.

Pour immediately over warm cake and gently spread. (Frosting will firm up quickly and spreads best while still hot.)


Saturday, April 21, 2018

Vanilla Texas Sheet Cake


So, after I made three or four chocolate sheet cakes in a row I suddenly began to wonder if there was a vanilla version of the Texas Sheet Cake, and (if so) if it would translate well to gluten free.  I was a little hesitant to try it because I had the idea in my head that chocolate cakes always transition to GF better than vanilla ones.  But I had a free afternoon, so I tried it. I found a recipe here and modified it to be a little closer to my original chocolate version. So far I've made it twice, and it's been a big hit each time, with people fighting over the last piece :)

Vanilla Texas Sheet Cake

2 c. EGF all-purpose flour
2 c. sugar
1 tsp. xanthan gum
1 tsp. baking soda
1/2 tsp. salt
1 c. butter (2 sticks)
1 c. water
1/2 c. buttermilk (I use 1/2 c. whole milk plus about 1.5 tsp. lemon juice)
3 eggs
1 tsp. vanilla

In a large bowl, combine flour mix, sugar, xanthan gum, baking soda, and salt. In a medium pan, combine butter and water. Bring to a boil over medium high heat, stirring occasionally. Pour butter mixture into flour mixture and mix well until smooth. Add buttermilk, eggs, and vanilla and mix thoroughly. The batter will be quite thin.

Pour batter into a greased (or well-sprayed-with-Pam) 13x18 sheet cake pan. Bake at 400 degrees for 20-25 minutes. (The edges of the cake will pull away from the pan when the cake is done.) Remove from the oven and, while hot, top with the following frosting:

Browned Butter Frosting

1/2 c. butter (1 stick)
5 c. powdered sugar (about 1 1/3 lb.)
6 Tbs. milk
1 tsp. vanilla

Melt butter in a medium saucepan over medium-low heat, stirring continually, until butter is a light brown color and aromatic. (If you burn the butter, don't use it. Throw it out and start again.) Add powdered sugar a cup or so at a time, stirring until well incorporated each time and adding milk as necessary to keep the mixture mixable. Remove from heat and add any remaining milk and the vanilla. Mix well with a hand mixer or stand mixer until smooth.

Pour immediately over hot cake (frosting will firm up quickly and spreads best while still hot).

Friday, April 20, 2018

Gluten Free Texas Sheet Cake


I've been making a lot of Texas Sheet Cakes lately. I hadn't ever really tried to make a gluten free version of it until recently. I'm not sure why...perhaps because I'm not a huge huge chocolate cake fan. But one day a few weeks ago I suddenly wanted to make one, so I pulled out my mom's old recipe, compared it to a recipe I found on the web, made some GF adjustments and set to work. The first one was a little crumbly and hadn't been cooked quite enough, but subsequent trials were just lovely. So I thought I'd share.  Enjoy!

Texas Sheet Cake

2 c. EGF all-purpose flour
2 c. sugar
1 tsp. xanthan gum
1 tsp. baking soda
1/2 tsp. salt
1 c. butter (2 sticks)
1 c. water
4 Tbs. cocoa
1/2 c. buttermilk (I use 1/2 c. whole milk plus about 1.5 tsp. lemon juice)
3 eggs
1 tsp. vanilla

In a large bowl, combine flour mix, sugar, xanthan gum, baking soda, and salt. In a medium pan, combine butter, water, and cocoa. Bring to a boil over medium high heat, stirring occasionally. Pour cocoa mixture into flour mixture and mix well until smooth. Add buttermilk, eggs, and vanilla and mix thoroughly. The batter will be quite thin.

Pour batter into a greased (or well-sprayed-with-Pam) 13x18 sheet cake pan. Bake at 400 degrees for 20-25 minutes. (The edges of the cake will pull away from the pan when the cake is done.) Remove from the oven and, while hot, top with the following frosting:

Frosting for Texas Sheet Cake

1/2 c. butter (1 stick)
6 Tbs. milk
4 Tbs. cocoa
1 lb. powdered sugar (about 3 3/4 cups)
1 tsp. vanilla
1 c. coarsely chopped pecans

Combine butter, milk, and cocoa in a medium saucepan and bring to a boil over medium high heat, stirring constantly. Remove from heat and pour over powdered sugar. Add vanilla. Mix well. Add chopped nuts. Pour immediately over hot cake (frosting will firm up quickly and spreads best while still hot).


Tuesday, September 26, 2017

Peach Right-Side-Up Cake

When I was little my mother made a pineapple upside-down cake. She may have made more than one, but I disliked it so much that I don't really remember.  I don't know why I disliked it ... lots of people LOVE Pineapple Upside-Down Cake. And I myself love fresh pineapple. I don't even mind canned pineapple ... but I will happily forego eating Pineapple Upside-Down Cake for the rest of my life.  Sometime this spring, however, I saw a picture on facebook of a PEACH Upside-Down Cake.  Now, THAT appealed to me. So I googled some recipes and started to play. I don't actually turn the cake upside down - we just eat it straight out of the cake pan,with vanilla ice cream, cool whip, or whipped cream - which is why I call it a Right-Side-Up Cake.

Wednesday, April 26, 2017

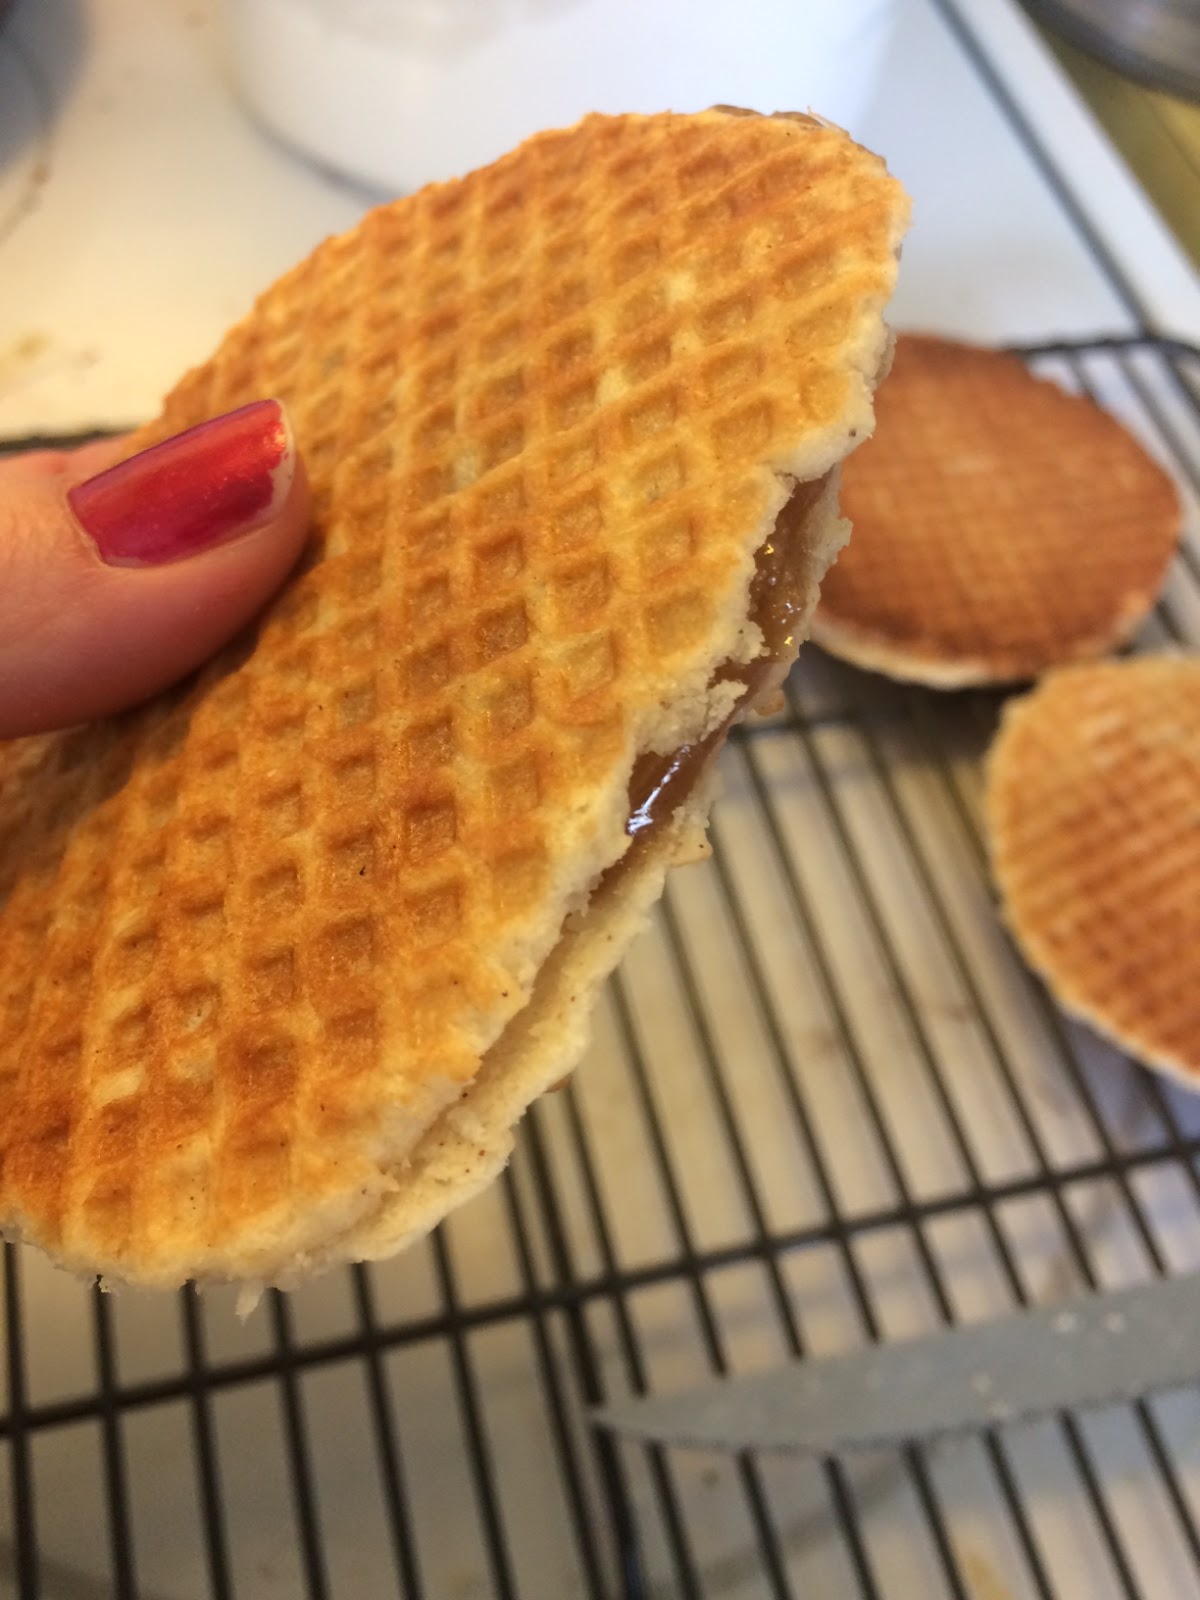
Gluten Free Stroopwafels


Last year my family and I went to a tulip festival held here in Utah Valley. There was a vendor selling Stroopwafels… a Dutch treat that's kind of a crispy, thin cookie filled with a cinnamony caramel syrup.  They were, of course, full of gluten. But that didn't stop my husband and me from enjoying them… it only stopped me from being able to share with the children. At the time I wondered if I could make some gluten-free, but when I looked up recipes they all called for yeast. As yeast-based breads are often hard to translate into gluten free versions, I decided not to try it then. Today, though,  I suddenly worked up enough energy to give it a shot.

Tuesday, March 28, 2017

Gluten Free Graham Crackers


A couple of weeks ago I made graham crackers for a dessert. I used the recipe in our second cookbook, but as I baked them I realized again that I have not been in love with this recipe for a while. Somehow the graham crackers always seem to boil away. And they are chewy… And they just aren't quite as good as I want them to be. So today I decided that I would take a look at the recipe and see what I could do to improve it.

Monday, January 25, 2016

Oatmeal White Chocolate Chip and Craisin Muffins

I know, I know. Posting once a year is not really sufficient to make people think that I really intend to maintain this blog. Two words: Seven Children. So, sorry and all that, but the lack of posts will probably continue (though I would like to TRY to be better ... but we'll have to see how that actually works out).

I've been craving muffins recently. My brother was here for Christmas and he bought some huge muffins at Costco and then left several of them in my freezer when he returned to Hawaii. I tried to eat one the other day. It was ... not yummy. So I decided that I would just make muffins several times a week until I don't want them anymore. 

First I made Lemon Raspberry Muffins (which were fabulous ... maybe that will be my next post). Two days afterward I decided I wanted something a little heartier, so I googled oatmeal muffin recipes. I tried one from the Food Network (making several adjustments, additions, and deletions because that's the way I tend to cook). They were really good, but I realized afterward that I had accidentally doubled all the ingredients except for the sugar. So I made them again this morning. Just now, as I thought about it, I realized that I used one more egg this morning than I did last time. I'm not really sure which version I liked best ... So I'm posting both. Try them and then let me know which is your favorite!


Full Sugar Version
Low Sugar/Fewer Eggs Version

Thursday, February 26, 2015

The last year or so . . .

Over the last year or so I have done much cooking.  First of all I cooked a baby.  Well, only in a figurative sense, but he took a lot of time and effort anyway. As part of that particular project, I STOPPED cooking very many carb-loaded things because somehow I ended up with gestational diabetes. Once he was born I got all excited to bake again . . . only to come up against several food issues on the part of my nursing baby.  For a while I swear I was eating little but chicken and rice - and cried when the allergist told me to remove rice, too.  However, we both somehow came through the experience without starving to death, and I'm down to avoiding just two main foods.  Hooray!

Anyway, I'm wondering if there are any particular recipes that you all are hoping to hear about.  I've got a new (much easier and very yummy) cinnamon roll recipe that I've worked out in the last couple of months that I plan to share, but otherwise I'm kind of low on ideas.  Any suggestions?

Monday, November 25, 2013

Thanksgiving is coming! Thanksgiving is coming!


It's the Monday before Thanksgiving.  My family is staying put this Thanksgiving.  There will be no 6 hour car trips to visit family.  Or 12 hour car trips (which, obviously, take even longer and involve way more crying on my part and way more potty breaks for children with small bladders). This means that I will be cooking a Thanksgiving meal all by myself.

Deep Breaths.

The good news is that I appear to have enough motivation to actually prepare things on time!  I have done almost all of my grocery shopping (I think I still need some fruit cocktail, but psssshhhhh.  What's a can or two? It could be a turkey and some potatoes and some olives and pecans and pumpkin and whipping cream and celery and carrots and, and, and. . . . So I feel like I'm doing very well.

Also, today I made cubes of bread for stuffing.  And I took pretty pictures.  And now I'm WRITING about it! So that means I am doing VERY WELL INDEED.  Now, I know that I have previously written a post about making stuffing, but that was several years ago and just contained one lousy picture.  So I'm going to post the instructions again . . . Enjoy!

Wednesday, October 16, 2013

Lemon Raspberry Cream Cheesecake

 (I couldn't find my camera.  So you get mediocre cell phone pics instead.)

On our anniversary, my husband and I went to the Cheesecake Factory.  For dessert we ordered a piece of their Lemon Raspberry Cream Cheesecake.  I took one bite, closed my eyes, and told him: "THIS is the dessert I wanted last weekend." ("Last weekend" had contained a really rough date night, with tantrum-throwing children keeping us close to home and the whole thing topped off by a complete failure to find the really delicious fresh-tasting dessert I was craving.) Of course, I didn't KNOW that Lemon Raspberry Cream Cheesecake was exactly what I was craving at the time.  I had a only a general idea of what the perfect dessert would taste like . . . which is probably why we didn't find it.  This cheesecake, though, was definitely it.  The slightly tart, summery taste of lemon was perfectly complimented by the raspberries and . . . well, if you've ever tasted it, you know what I mean. 

Tuesday, October 15, 2013

Aren't the pictures pretty?

So, while I was making Lemon Raspberry Cream Cheesecake for my sister's birthday today (and, oh my goodness it is SO GOOD), I decided I should do some work on the blog.  So I logged in and tried to see if I could add some pretty pictures to the background and accidentally saved it and lost the previous format for forever.  Oops.  But the new pictures in the background are pretty, if rather distracting, so I suppose it'll serve until I get the motivation to figure out how to make it look exactly how I want it to look. 

And the cheesecake recipe?  Well, you'll just have to wait until tomorrow.  :)