Pages

Showing posts with label gluten free desserts. Show all posts

Sunday, May 24, 2020

Gluten Free Yellow Cake


I’ve been on a cake making kick, evidently. A couple of weeks ago I decided to revamp the yellow cake recipe I’ve been using for a while. I’ve actually been a little disenchanted with it, even though I invented it myself. Recently it’s just seemed too…heavy. And the texture hasn’t been quite right. So I compared that recipe with the Vanilla Texas sheet cake that I’ve been making, and ended up with this recipe. Well, actually I ended up with a recipe that didn’t work quite as well as I wanted. So THIS time I decreased the buttermilk and it turned out beautifully. It’s not quite as tall as I’d like it to be, but that could probably be fixed by making a 1.5 times recipe and then baking it a little longer. I’ll let you know how it turns out after I try it :)

Gluten Free Yellow Cake

3/4 c. butter, softened
1.5 c. sugar
3 eggs
2 c. EGF all-purpose flour
1 tsp. xanthan gum
2 tsp. baking powder
1/2 tsp. salt
1 c. buttermilk (I use just under 1 c. whole milk plus about 2-3 tsp. lemon juice; don’t go crazy, though, or you’ll end up with a lemon cake)
1 tsp. vanilla

Preheat oven to 375°. Prepare a 9 x 13 pan (either by spraying it with nonstick cooking spray or by lining it with parchment paper).

Combine butter and sugar in a stand mixer. Beat on medium to high speed until light and fluffy. Add eggs and mix well. Combine dry ingredients in a separate bowl. Combine buttermilk and vanilla. Alternately add flour mixture and buttermilk to the creamed butter mixture, starting and ending with flour and mixing on low to medium speed after each addition until well incorporated. (Don’t go too overboard on the mixing, though. Because we are working with gluten free flours, the cake won’t get tough, but if you incorporated too much air into the cake batter the lack of gluten means the flour has a harder time keeping its structure around the air bubbles and then you’re more likely to get a collapsed cake. And NOBODY wants one of those.)

Pour batter into the prepared pan. Place in the preheated oven and bake for about 35 minutes (maybe a little less, maybe a little more). The cake will be pulling away from the edges of the pan and the top will spring back when gently touched. (Also a toothpick inserted in the center will come out clean. You know the drill.) Remove from oven and cool completely before frosting.


Before frosting - can you tell how the edges have pulled inward a bit? 

I frosted mine with a recipe of Lemon Buttercream Frosting that I found on Sally’s Baking Addiction. I did add  an extra couple of tablespoons of fresh lemon juice because the lemon flavor wasn’t quite strong enough for my taste. Altogether the cake was just delightful - the taste and texture were just like a homemade cake made with regular flour - and super easy to make. I’m excited to try it as the cake part of my Peach Right Side Up Cake, too!

The color is not quite right on this picture as it was taken inside, but you can see how cleanly it cut and how beautiful the texture was. 


Sunday, May 17, 2020

Peanut Butter Sheet Cake


So, it turns out I really like these sheet cakes. I’ve done chocolate, vanilla, and caramel sheet cakes, and today I decided to try a peanut butter version. I’m not sure what it is that helps these particular gluten free cakes to be so soft and light (I suspect the boiling water), but they’ve just been delicious. This peanut butter cake was no exception. Everyone liked it, even my daughter’s college roommate who, as a general rule, doesn’t like peanut butter things. Give it a try and tell me what you think!

Peanut Butter Texas Sheet Cake

2 c. EGF all-purpose flour
2 c. sugar
1 tsp. xanthan gum
1 tsp. baking soda
1/2 tsp. salt
1/2 c. butter (1 stick)
1/2 c. creamy peanut butter
1 Tbs oil
1 c. water
1/2 c. buttermilk (I use 1/2 c. whole milk plus about 1.5 tsp. lemon juice)
3 eggs
1 tsp. vanilla

In a large bowl, combine flour mix, sugar, xanthan gum, baking soda, and salt. In a medium pan, combine butter, peanut butter, oil, and water. Bring to a boil over medium high heat, stirring regularly. (Don’t worry if the peanut butter mixture starts to look separated - it will all mix in well in the end). Pour peanut butter mixture into flour mixture and mix well until smooth. Add buttermilk, eggs, and vanilla and mix thoroughly. The batter will be thin.

Pour batter into a greased (or well-sprayed-with-Pam or parchment-paper-lined) 13x18 sheet cake pan. Bake at 400 degrees for 20-25 minutes. (The edges of the cake will start to pull away from the pan when the cake is done, and the center of the cake will bounce back if gently touched (don’t burn yourself!).) Remove from the oven and, while hot, top with the following frosting:

Peanut Butter Frosting

1/2 c. butter (1 stick)
1/2 c. peanut butter (creamy or crunchy)
3 1/3 c. powdered sugar (just under 1 lb.)
6-7 Tbs. milk
1 tsp. vanilla

Place powdered sugar in the bow of a stand mixer. Combine butter, peanut butter, and milk in a medium saucepan over medium-high heat, stirring continually, until mixture starts boiling.  (Again, don’t worry if the mixture separates some.) Turn the mixer on low and slowly pour the hot peanut butter mixture into the powdered sugar while the mixer is running.  Mix on medium speed until the powdered sugar is well-incorporated and the icing is smooth, then add the vanilla.

Pour immediately over warm cake and gently spread. (Frosting will firm up quickly and spreads best while still hot.)


Saturday, April 21, 2018

Vanilla Texas Sheet Cake


So, after I made three or four chocolate sheet cakes in a row I suddenly began to wonder if there was a vanilla version of the Texas Sheet Cake, and (if so) if it would translate well to gluten free.  I was a little hesitant to try it because I had the idea in my head that chocolate cakes always transition to GF better than vanilla ones.  But I had a free afternoon, so I tried it. I found a recipe here and modified it to be a little closer to my original chocolate version. So far I've made it twice, and it's been a big hit each time, with people fighting over the last piece :)

Vanilla Texas Sheet Cake

2 c. EGF all-purpose flour
2 c. sugar
1 tsp. xanthan gum
1 tsp. baking soda
1/2 tsp. salt
1 c. butter (2 sticks)
1 c. water
1/2 c. buttermilk (I use 1/2 c. whole milk plus about 1.5 tsp. lemon juice)
3 eggs
1 tsp. vanilla

In a large bowl, combine flour mix, sugar, xanthan gum, baking soda, and salt. In a medium pan, combine butter and water. Bring to a boil over medium high heat, stirring occasionally. Pour butter mixture into flour mixture and mix well until smooth. Add buttermilk, eggs, and vanilla and mix thoroughly. The batter will be quite thin.

Pour batter into a greased (or well-sprayed-with-Pam) 13x18 sheet cake pan. Bake at 400 degrees for 20-25 minutes. (The edges of the cake will pull away from the pan when the cake is done.) Remove from the oven and, while hot, top with the following frosting:

Browned Butter Frosting

1/2 c. butter (1 stick)
5 c. powdered sugar (about 1 1/3 lb.)
6 Tbs. milk
1 tsp. vanilla

Melt butter in a medium saucepan over medium-low heat, stirring continually, until butter is a light brown color and aromatic. (If you burn the butter, don't use it. Throw it out and start again.) Add powdered sugar a cup or so at a time, stirring until well incorporated each time and adding milk as necessary to keep the mixture mixable. Remove from heat and add any remaining milk and the vanilla. Mix well with a hand mixer or stand mixer until smooth.

Pour immediately over hot cake (frosting will firm up quickly and spreads best while still hot).

Friday, April 20, 2018

Gluten Free Texas Sheet Cake


I've been making a lot of Texas Sheet Cakes lately. I hadn't ever really tried to make a gluten free version of it until recently. I'm not sure why...perhaps because I'm not a huge huge chocolate cake fan. But one day a few weeks ago I suddenly wanted to make one, so I pulled out my mom's old recipe, compared it to a recipe I found on the web, made some GF adjustments and set to work. The first one was a little crumbly and hadn't been cooked quite enough, but subsequent trials were just lovely. So I thought I'd share.  Enjoy!

Texas Sheet Cake

2 c. EGF all-purpose flour
2 c. sugar
1 tsp. xanthan gum
1 tsp. baking soda
1/2 tsp. salt
1 c. butter (2 sticks)
1 c. water
4 Tbs. cocoa
1/2 c. buttermilk (I use 1/2 c. whole milk plus about 1.5 tsp. lemon juice)
3 eggs
1 tsp. vanilla

In a large bowl, combine flour mix, sugar, xanthan gum, baking soda, and salt. In a medium pan, combine butter, water, and cocoa. Bring to a boil over medium high heat, stirring occasionally. Pour cocoa mixture into flour mixture and mix well until smooth. Add buttermilk, eggs, and vanilla and mix thoroughly. The batter will be quite thin.

Pour batter into a greased (or well-sprayed-with-Pam) 13x18 sheet cake pan. Bake at 400 degrees for 20-25 minutes. (The edges of the cake will pull away from the pan when the cake is done.) Remove from the oven and, while hot, top with the following frosting:

Frosting for Texas Sheet Cake

1/2 c. butter (1 stick)
6 Tbs. milk
4 Tbs. cocoa
1 lb. powdered sugar (about 3 3/4 cups)
1 tsp. vanilla
1 c. coarsely chopped pecans

Combine butter, milk, and cocoa in a medium saucepan and bring to a boil over medium high heat, stirring constantly. Remove from heat and pour over powdered sugar. Add vanilla. Mix well. Add chopped nuts. Pour immediately over hot cake (frosting will firm up quickly and spreads best while still hot).


Tuesday, September 26, 2017

Peach Right-Side-Up Cake

When I was little my mother made a pineapple upside-down cake. She may have made more than one, but I disliked it so much that I don't really remember.  I don't know why I disliked it ... lots of people LOVE Pineapple Upside-Down Cake. And I myself love fresh pineapple. I don't even mind canned pineapple ... but I will happily forego eating Pineapple Upside-Down Cake for the rest of my life.  Sometime this spring, however, I saw a picture on facebook of a PEACH Upside-Down Cake.  Now, THAT appealed to me. So I googled some recipes and started to play. I don't actually turn the cake upside down - we just eat it straight out of the cake pan,with vanilla ice cream, cool whip, or whipped cream - which is why I call it a Right-Side-Up Cake.

Wednesday, April 26, 2017

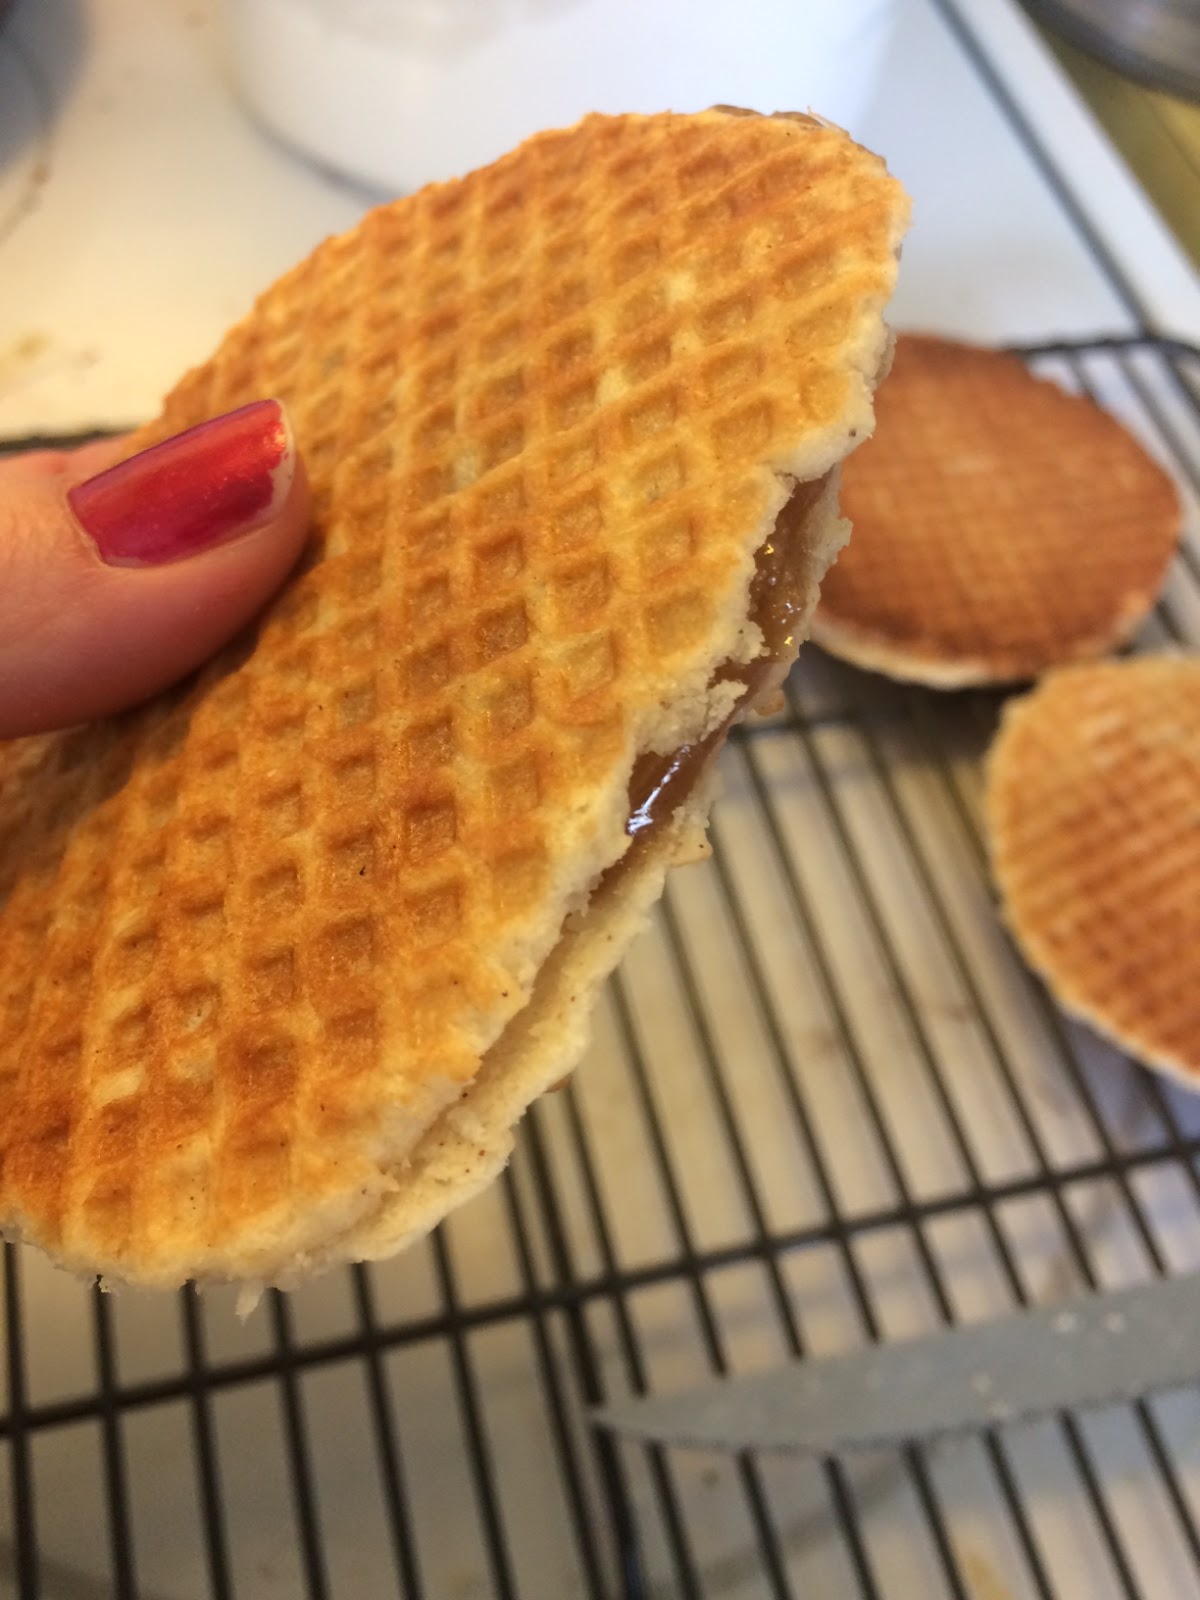
Gluten Free Stroopwafels


Last year my family and I went to a tulip festival held here in Utah Valley. There was a vendor selling Stroopwafels… a Dutch treat that's kind of a crispy, thin cookie filled with a cinnamony caramel syrup.  They were, of course, full of gluten. But that didn't stop my husband and me from enjoying them… it only stopped me from being able to share with the children. At the time I wondered if I could make some gluten-free, but when I looked up recipes they all called for yeast. As yeast-based breads are often hard to translate into gluten free versions, I decided not to try it then. Today, though,  I suddenly worked up enough energy to give it a shot.

Tuesday, March 28, 2017

Gluten Free Graham Crackers


A couple of weeks ago I made graham crackers for a dessert. I used the recipe in our second cookbook, but as I baked them I realized again that I have not been in love with this recipe for a while. Somehow the graham crackers always seem to boil away. And they are chewy… And they just aren't quite as good as I want them to be. So today I decided that I would take a look at the recipe and see what I could do to improve it.

Wednesday, October 16, 2013

Lemon Raspberry Cream Cheesecake

 (I couldn't find my camera.  So you get mediocre cell phone pics instead.)

On our anniversary, my husband and I went to the Cheesecake Factory.  For dessert we ordered a piece of their Lemon Raspberry Cream Cheesecake.  I took one bite, closed my eyes, and told him: "THIS is the dessert I wanted last weekend." ("Last weekend" had contained a really rough date night, with tantrum-throwing children keeping us close to home and the whole thing topped off by a complete failure to find the really delicious fresh-tasting dessert I was craving.) Of course, I didn't KNOW that Lemon Raspberry Cream Cheesecake was exactly what I was craving at the time.  I had a only a general idea of what the perfect dessert would taste like . . . which is probably why we didn't find it.  This cheesecake, though, was definitely it.  The slightly tart, summery taste of lemon was perfectly complimented by the raspberries and . . . well, if you've ever tasted it, you know what I mean. 

Friday, March 15, 2013

Poured Fondant

Now, the first thing we need to clear up is that this is NOT a recipe for a rolled fondant.  This is not the sort of fondant that you would find in a thick white (generally inedible) layer on the outside of a wedding cake. The texture of this is more like the chocolate topping on doughnuts . . . something that isn't quite icing and is smooth and rather firm. It's fabulous stuff, and because it is just sugar, water, and corn syrup it stores quite well at room temperature for a long time.  Some of the YouTube videos I watched said it was good for several months.  I don't know for sure that that is true because the longest a double batch has survived my B&W cookie making binges is 2 weeks.  But it was still fabulous after two weeks, for what that's worth.

The second thing that you should know is that it takes a little practice to get this right.  Well, it took some practice for ME to get this right.  Hopefully the things that I have learned over the last few weeks will make your learning curve less steep than mine.  But the point is, don't give up if it doesn't turn out quite right the first time.  It's totally worth the effort.

Poured Fondant

2 1/2 c. sugar
1/2 c. water
1/4 c. corn syrup

Combine all ingredients in a heavy saucepan. (I have found that a non-stick pan is helpful when washing sugar crystals off the sides of the pan.)  Cook over medium high heat until it boils, stirring gently the whole time.  (Try not to splash up on the sides of the pan.  Sugar crystals that don't get thoroughly dissolved into the syrup will cause problems with your fondant.  Any undissolved crystals that remain in the final syrup will quickly cause the rest of the syrup to re-crystallize . . . thus undoing all your hard work.)

Once the syrup has come to a rolling boil, decrease the heat to medium, attach a candy thermometer to the side of the pan, and stop stirring.  Use a pastry brush or a very wet paper towel to wash any stray sugar crystals down from the side of the pan. (I've also washed the crystals down by placing a lid on the pot for just a few minutes after it starts boiling.) Let the syrup boil until it reaches 238 degrees.** (**Remember that, when cooking candies, you must decrease the temperature by 2 degrees Fahrenheit for every 1,000 feet above sea level. Here in Utah County I only cook this syrup to 228 degrees.) 

Once the syrup reaches 238 degrees, remove it from the heat and allow the syrup to cool to 140 degrees.  (This takes 30 - 50 minutes, but it's really important.  If you try to move on without allowing the syrup to cool you will end up with little rocks of sugary stuff and then you will be unhappy.  I think it does that because all the moisture steams out of it so quickly when it is that hot. One of these days I'm going to try letting the syrup cool on a cookie sheet and then transfer it into my mixer because I'm sure it will cool faster and I'm always really impatient . . . but I haven't done it yet and so I can't guarantee that it will work.)

Once the syrup has cooled to 140 degrees (again, decrease the temperature if you are at a high altitude), transfer it to the bowl of a stand mixer. Turn the mixer on low.  (I use a K beater attachment for this).  The syrup will first turn yellow and then white. As soon as it turns white, pour it into a ziploc bag that you have stretched open over a glass measuring cup or something. (Don't beat it too long after it turns white as it will harden very quickly and then your mixer might seize up and you will be unhappy again. It really only takes a couple of minutes to turn white, so don't walk away from your mixer while you are doing this.)  If it gets rather firm while you are removing the beater, just scrape it out of the mixer bowl with a wooden spoon . . . it should be okay.

Seal the fondant air-tightly and store at room temperature. 

Vanilla Poured Fondant - Make a simple sugar syrup by bringing 4 Tbs. sugar and 2 Tbs. water just to a boil.  Remove from heat.  Place between 1/2 c. and 1 c. of fondant in a double boiler*. (*I make a pseudo double boiler by putting 1 1/2 cups of really hot water in my 4 cup glass measuring cup, then placing my 2 cup glass measuring cup inside it.)  Add a Tbs or so of the simple syrup to the fondant and stir it with a spoon until smooth, adding more simple syrup as necessary.  (You'll have to rather chop at the fondant at first, but it will thin down and become easier to stir soon.)  If you add too much syrup, the only way to fix it is by adding more fondant, so be careful not to overdo it.  Once the fondant is smooth and spreadable, add about 1/2 tsp. vanilla.

Chocolate Poured Fondant -  Add a couple of Tbs. of dutch processed cocoa to your vanilla fondant.  Stir well.  Add more simple syrup as needed to make it spreadable. 

If you need more information on Poured Fondant (or want to see some pictures), this blog post by Joe Pastry is very helpful.  I also found some great information at this site, although I don't agree with some of the information provided there (I've tried cooking it quickly and it always seemed to crystallize into a thick crust almost as soon as I poured it out of my pan). 

Wednesday, August 15, 2012

Pumpkin Cookies


Pumpkin Cookies

1 c. butter, softened
1 c. white sugar
1 c. light brown sugar
1 (3.4 oz.) pkg. instant vanilla pudding mix
2 large eggs
1 tsp. vanilla extract
1 1/2 c. canned pumpkin puree
3 c. EGF All-Purpose Flour
1 tsp. xanthan gum
2 tsp. baking soda
1/2 tsp. salt
1 1/4 tsp. ground cinnamon
1/2 tsp. ground ginger
1/4 tsp. ground nutmeg
1/4 tsp. ground cloves
1/2 c. milk chocolate chips

Preheat the oven to 350°.

Spray cookie sheets with nonstick spray or line them with parchment paper. In a large mixing bowl whip the butter until smooth. Beat in the white and brown sugars and dry pudding mix. Mix until the mixture is light and fluffy. Beat in the eggs 1 at a time. (If you want fluffy cookies, use a whisk attachment and beat for 3-4 minutes. If you want them flat, use a flat beater and mix just until the eggs are blended. ) Mix in the vanilla and pumpkin puree. Add the flour, xanthan gum, baking soda, salt, cinnamon, ginger, nutmeg, and cloves. Stir in the chips.

Scoop the cookie dough by heaping tablespoons onto the prepared cookie sheets and bake for 13-15 minutes or until the cookies are browned around the edges.

Wednesday, July 25, 2012

Zucchini Bread


Zucchini Bread

1 1/2 c. GF mix
3/4 tsp. xanthan gum
1 tsp. cinnamon
1/2 tsp.baking soda
1/4 tsp. baking powder
1/4 tsp. salt
1/4 tsp. nutmeg
1 c. sugar
1 c. finely shredded, unpeeled zucchini
1/4 c. oil
1 egg
1/4 tsp. finely shredded lemon peel
1/2 c. chopped walnuts or pecans

Preheat Oven to 350°. Grease one 8x4x2 loaf pan.

Combine flour mix, xanthan gum, cinnamon, baking soda, baking powder, salt and nutmeg. In another bowl, combine sugar, zucchini, oil, egg, and lemon peel. Mix well. Add dry mix to zucchini mix. Stir just until moistened. Fold in nuts. Pour into pan.

Bake for 55 to 60 minutes, until knife inserted in the center comes out clean. Cool in pan for 10 minutes, then remove from pan and cool completely

Friday, April 13, 2012

Waffle Cones


My children wanted waffle cones, I was feeling a bit adventurous, and so . . we have multicolored waffle bowls. You really need a waffle cone maker in order for these to work. If you don't have one, you can pick one up at Walmart or Target. I say it's worth it, because you can make dozens of cones for just pennies, instead of having to buy 12 pre-made GF cones for $5.00. Hope you enjoy!

Waffle Cones/Bowls


3 eggs
3/4 c. sugar
1/2 c. butter, melted and cooled
2 Tbs. vanilla
1 c. EGF All-Purpose Flour
3/4 tsp. xanthan gum
1 tsp. baking powder


Beat eggs, gradually adding sugar. Add cooled butter and vanilla. In another bowl, combine flour mix, xanthan gum, and baking powder. Blend into egg mixture until smooth. Dough will be sticky. Drop by the heaping spoonful onto a hot waffle-cone baker.

Bake as directed, usually for about 20 seconds. Remove from baker and either roll around a waffle cone shaper or drape over an upside-down bowl or cup. The cones will harden quickly as they cool.

Friday, April 6, 2012

Butterscotch Crinkles


Butterscotch Crinkles

My daughter's kindergarten teacher made these for us one day, and my kids loved them!!! Not very healthy, and a bit expensive once you buy the gluten free cornflakes, but quite addicting once you taste them. So, if you make them and happen to put on ten or so pounds, it's totally not my fault. Blame it on kindergarten.

1/2 c peanut butter
1 bag of gluten free butterscotch chips
6 c of gluten free cornflakes (I bought mine at Macey's grocery store in the GF section)

You can half all of this too and make a smaller batch.....I would if you plan on NOT sharing....hehehehe:)

Melt the peanut butter and butterscotch in the microwave for about 30 seconds.  Pull out and stir then put in for another 30 seconds.  Continue stirring, melting, then checking until melted all the way through. Then add cornflakes....mix....then put on wax paper to dry. You might need to heat a little longer depending on your microwave. Make sure you don't cook over stove too....it won't cook right! Have fun eating!

Thursday, March 29, 2012

Orange Rolls


1 1/2 Tbs. yeast
1 1/2 Tbs. sugar
3/4 c. warm water
1 c. scalded milk
1/2 c. sugar
6 Tbs. butter
1 tsp salt
1 tsp vinegar
3 c. GF mix
1 Tbs. xanthan gum
3 eggs
1/4 c. margarine, melted

Filling:
1 c. granulate sugar
4 tsp freshly grated orange peel

Orange glaze:
1/3 c powdered sugar
1 Tbs orange juice concentrate
3 Tbs water

In a small bowl combine yeast, 1 1/2 Tbs. sugar, and water. Set aside.

Add butter to the scalded milk and let melt while milk cools. In the bowl of a stand mixer, beat eggs well. Stir the cooled milk mixture and add to the eggs. Add salt and vinegar. Add foamy yeast mixture. Slowly stir in xanthan gum and GF mix. The dough will be very sticky. Cover the bowl with plastic wrap and let it sit in the fridge overnight. (Don't try to skip this step. The dough needs to sit overnight, or it just doesn't work right. We know. We've tried!)

Dust the surface of a sheet of waxed paper with GF mix, making sure it is covered completely. Place half the dough onto the paper. Dust the top of the dough with enough GF mix to keep the rolling pin from sticking. Roll the dough into a long rectangle, approximately 6x18 inches. (If necessary add more flour underneath or on top.)

Combine all filling ingredients. Brush the top of the rectangle of dough with melted butter and spread filling generously onto rectangle.


Starting at one of the long sides, roll up the dough and cut into 1 1/2" slices. Place slices on a well-greased baking sheet. Repeat with other half of dough.


Preheat oven to 350 degrees. Let rolls rise 20-25 minutes. Bake for 20-25 minutes. Glaze or frost as desired. Store in an airtight container to keep moist.


Tuesday, March 20, 2012

Batman Cake

One of my good friend's son was turning six. My friend had just had a baby, and since her son has celiac, she asked if she could hire me to make his cake. I agreed, hoping that my husband (who is extremely talented and amazing) would be willing to help me. Batman never looked (or tasted) so good! I've included pictures of the steps we took when frosting him, in case anyone ever wants to make a Batman cake for themselves.


Stage 1- Get a superhero cake pan- this one was actually superman, but you can't tell. It's also been He-man, Green Lantern, Iron man, and several other superheroes. Once the cake is baked, freeze it overnight. This will ensure that it does not fall apart when frosting. Then frost the gray armor part of the cake.


Stage 2- Add an enormous amount of food coloring into your white frosting and turn it black. Yes it stains everything, including mouths, hands, counter tops etc. But it looks cool!


Stage 3- Eyes, bat, and belt. Not much to explain.


Stage 4- The face. Make the frosting orange and then keep adding white frosting until it's the skin color you desire.


Stage 5 - The outlining. Take some of your leftover black frosting and some of your lighter gray frosting and mix them together. You get a whole new shade of gray to outline muscles with!


And like magic, it's done! Then of course you bask in your own awesomeness and maybe post it on a blog for the world to see!

Thursday, March 8, 2012

Bite Size Oreo Cookies


Bite Size Chocolate Sandwich Cookies (Oreo's)

1 3/4 c. margarine
1 large pkg. instant chocolate pudding mix
1 1/2 c. sugar
2 eggs
2 tsp. vanilla
4 c. featherlight mix
3/4 c. special dark cocoa powder
1 3/4 tsp. xanthan gum
3/4 tsp. baking powder
1/3 tsp. salt

Cream margarine, pudding mix, and sugar. Add eggs one at a time, beating well after each. Add vanilla. Combine dry ingredients and add to creamed mixture.

Chill about 1 hour. Dust a clean surface with potato starch or featherlight mix. Roll out about 1/8 of an inch thick, adding enough potato starch to make the dough less sticky. Cut with a small, round cookie cutter (about 1 inch in diameter to make minis).

Bake at 350° for about 10 minutes. Remove from cookie sheet and allow to cool.

Filling
3 3/4 c. powdered sugar
1 1/2 Tbs. granulated sugar
1/2 tsp. vanilla
1/2 c. vegetable shortening
2 Tbs. hot water

Combine all filling ingredients and beat until smooth. Roll 1 - 2 teaspoons of filling into a ball. Gently squish the ball of filling between 2 cookies. Store in a closed container.

Happy Cooking!!

Mini Eclair Cake


Aren't these beautiful? My six year old thought so. She had a puppy theme birthday party and requested this cake. I decided to make individual mini cakes for everyone so I would not have to deal with cutting this delicious filled cake. It was a hit! Everyone loved the mini eclair cakes and thought they were adorable. They were really easy and very tasty. Enjoy! Happy cooking! :)

Mini Eclair Cake

Base:
1/2 c water
1/4 c butter
2 eggs
1/2 c Featherlight Mix

Filling:
1 (3.4oz0 pkg. of instant pudding(any flavor)
1 1/4 c milk
1/2 tsp vanilla
8 oz. cool whip

Topping:
1/4 c semi-sweet chocolate chips
1 Tbs butter
1 Tbs milk
1/2 tsp vanilla
1/2 c powder sugar

Preheat oven to 400 °F

Combined the water and butter in a medium saucepan and bring to a boil. Add Featherlight mix, stirring until dough forms a ball. Remove from heat and pour into a medium bowl. Add eggs, one at a time, beating well with an electric mixer after each. Spread dough in mini circles on a light greased cookie sheet.

Bake 35-40 minutes or until lightly browned. Remove from oven and cool completely.(The cake will be relatively flat no puffy like a cream puff.)

While the cake is cooling, make filling and topping. For filling, combine pudding and milk. Mix well. Add vanilla and cool whip. Beat with a hand mixer.

Make topping by melting chocolate, butter, and milk in the microwave for 60 seconds, stirring after each 30 seconds. Stir in vanilla and powder sugar. Put topping in a sandwich bag.

Carefully slice the cakes into two semi-circles. Spread filling on one semi-circle. And place another on top.

With a toothpick, poke a whole in the bag containing the topping. Drizzle the topping over the cakes. Refrigerate for at least 10-20 minutes before serving, in order to set the topping.

Tuesday, February 21, 2012

Chocolate Drizzled Pretzels


The other day my daughter was craving something sweet, yet salty. She was desparately searching through our cupboards when she came across the gluten free pretzels (Glutino pretzels are the tastiest) and some chocolate chips. She decided the lay out the pretzels on some wax paper, melt the chocolate chip and then drizzle the chocolate over the pretzels. That in and of itself would have been yummy enough, but she took it one step farther and found some caramel syrup in our fridge and added that to the top of the chocolate pretzels. Can I just say YUM!!! I loved it not only because caramel, chocolate pretzels are one of my most favorite treats, but because I did not have to do anything except eat them! So, if you have pretzels in your cupboard and feel like fancifying them up, get out that chocolate and get busy!

Tuesday, January 31, 2012

Pop-Tarts


My neighbor called me up a couple of days ago and said she had been watching a cooking show and they were making pop-tarts. My first thought was "who would want to make pop-tarts? They aren't even that good." My next thought was "I bet I could make pop-tarts." And then I found myself making pop-tarts. I filled them with raspberry jam simply because that is what I had on my shelf, and because strawberry jam with cream cheese frosting on top, sounded really yummy. The tarts were actually easier than I expected, and when I tasted them I thought to myself, "I love pop-tarts!"

pop-tart crust
This is just our basic pie crust, rolled thin and cut into rectangles.

2 c. GF all purpose flour mix
1/2 tsp. xanthan gum
2 Tbs. sugar
1/2 tsp. salt
6 oz. Cream cheese
1 c. real butter (or I used I can't Believe It's Not Butter)

Cream all ingredients together.
Refrigerate for 30 minutes- 1 hour.
The dough will be sticky.
On a clean surface sprinkle some flour down. Roll the dough out just like a normal pie crust. Cut into rectangles and place on a greased cookie sheet.


Place a scoop of thick jam or jelly onto the middle of the pastry square. Place a second square on top of the jam and press down around the edges to seal the jam inside the shell. Using a fork press down around the outside of the tart, and then using the same fork poke holes in the top of the pastry.


Bake at 350 for 20 minutes. Cool and frost with cream cheese frosting.

Frosting
8 oz. cream cheese
1/2 c. margarine
1 lb. powdered sugar (about 3 cups, I think)
1 tsp. vanilla

Thoroughly blend cream cheese and margarine. Slowly beat in powdered sugar. Add vanilla and beat until combined. Store in the refrigerator.

Alternate fillings: chocolate chips, Nutella, cinnamon and sugar.

Friday, December 23, 2011

Pumpkin Bread


I have been thinking about what kind of treats I should make for neighborhood gifts this Christmas. I intended to give away English Toffee, but I started making it too early and ate it all. (The kids helped, of course.) Then, while walking around Costco, I sampled some pumpkin bread. My GF girls were offended that they couldn't have some, so I decided that I would make a gluten free version for them. It turned out so well that I've promoted it to "Chief Neighborhood Treat Plate Filler". Good name, huh?

I had initially intended to use my banana bread recipe and just use pumpkin instead of bananas (plus add some of the right kind of pumpkin appropriate spices). But when I started looking at pumpkin bread recipes online, I realized that they all had at least TWICE as much sugar as my banana bread and a lot more oil. I suppose that the reason for the extra sugar is because pumpkin is nowhere near as sweet as over-ripe bananas. I wasn't sure about the extra oil, but I decided it might have a good reason, too. So I took an online recipe, changed several things (used GF flours, changed the spices to match MY ideas of good pumpkin spices, etc), and baked away. The Costco version was covered with Cream Cheese Frosting. I haven't added frosting to mine because it's so darn good without it! (I must admit that my children have been having a heyday with the Nutella, though. Evidently they believe that chocolate hazelnut butter is the best accompaniment to pumpkin things ever invented. And I haven't really argued too much about it. Who could?)

Pumpkin Bread

3 cups canned pumpkin puree (practically a full 29 oz. can)
1 1/2 cups vegetable oil
4 cups white sugar
6 eggs
5 cups EGF all-purpose flour
2 tsp. xanthan gum
1 1/2 tsp. baking powder
1 1/2 tsp. baking soda
1 1/2 tsp. salt
4 tsp. ground cinnamon
1 1/2 teaspoons ground cloves
1 1/2 tsp. ground ginger
1/2 tsp. mace

Preheat oven to 350 degrees. Grease 4 9x5 loaf pans. (I actually did 3 9x5 pans and then 2 4x3 pans.)

Combine pumpkin, oil, sugar, and eggs. Mix well.

In another bowl mix together the rest of the ingredients. Add to the pumpkin mixture and blend until well combined. Divide batter evenly between the prepared pans.

Bake at 350 for about 60 minutes. (The top should spring back when lightly touched, and a cake tester inserted into the thickest part of the loaf should come out clean.)

Cool. Enjoy!