Pages

Saturday, October 16, 2010

French Toast . . . 'cause I made bread yesterday!


While french toast isn't a terribly difficult thing to make gluten free, a recipe can't hurt, right? So, here goes:

French Toast

1 egg
2 tsp. oil
2 dashes cinnamon
2 tsp. milk
2 - 3 pieces gluten free bread

Combine egg, oil, and cinnamon. Mix well. (I once had a college roommate who just swirled her eggs a bit with a fork, which I think is just sick and wrong. So, too, did she, and she consequently hated french toast . . . until I made it for her and beat the eggs until they were well incorporated. Suddenly french toast was much more appealing!) Mix milk into the egg mixture. (You don't need a lot of milk - too much will prevent the egg mixture from browning well - but a little splash of milk prevents a fried-egg-on-toast flavor.)

Dip each piece of bread briefly in the egg mixture, turning once to coat both sides. Place on a hot griddle (about 375 degrees, if you have an electric one). Cook until golden brown, then flip and cook the other side.

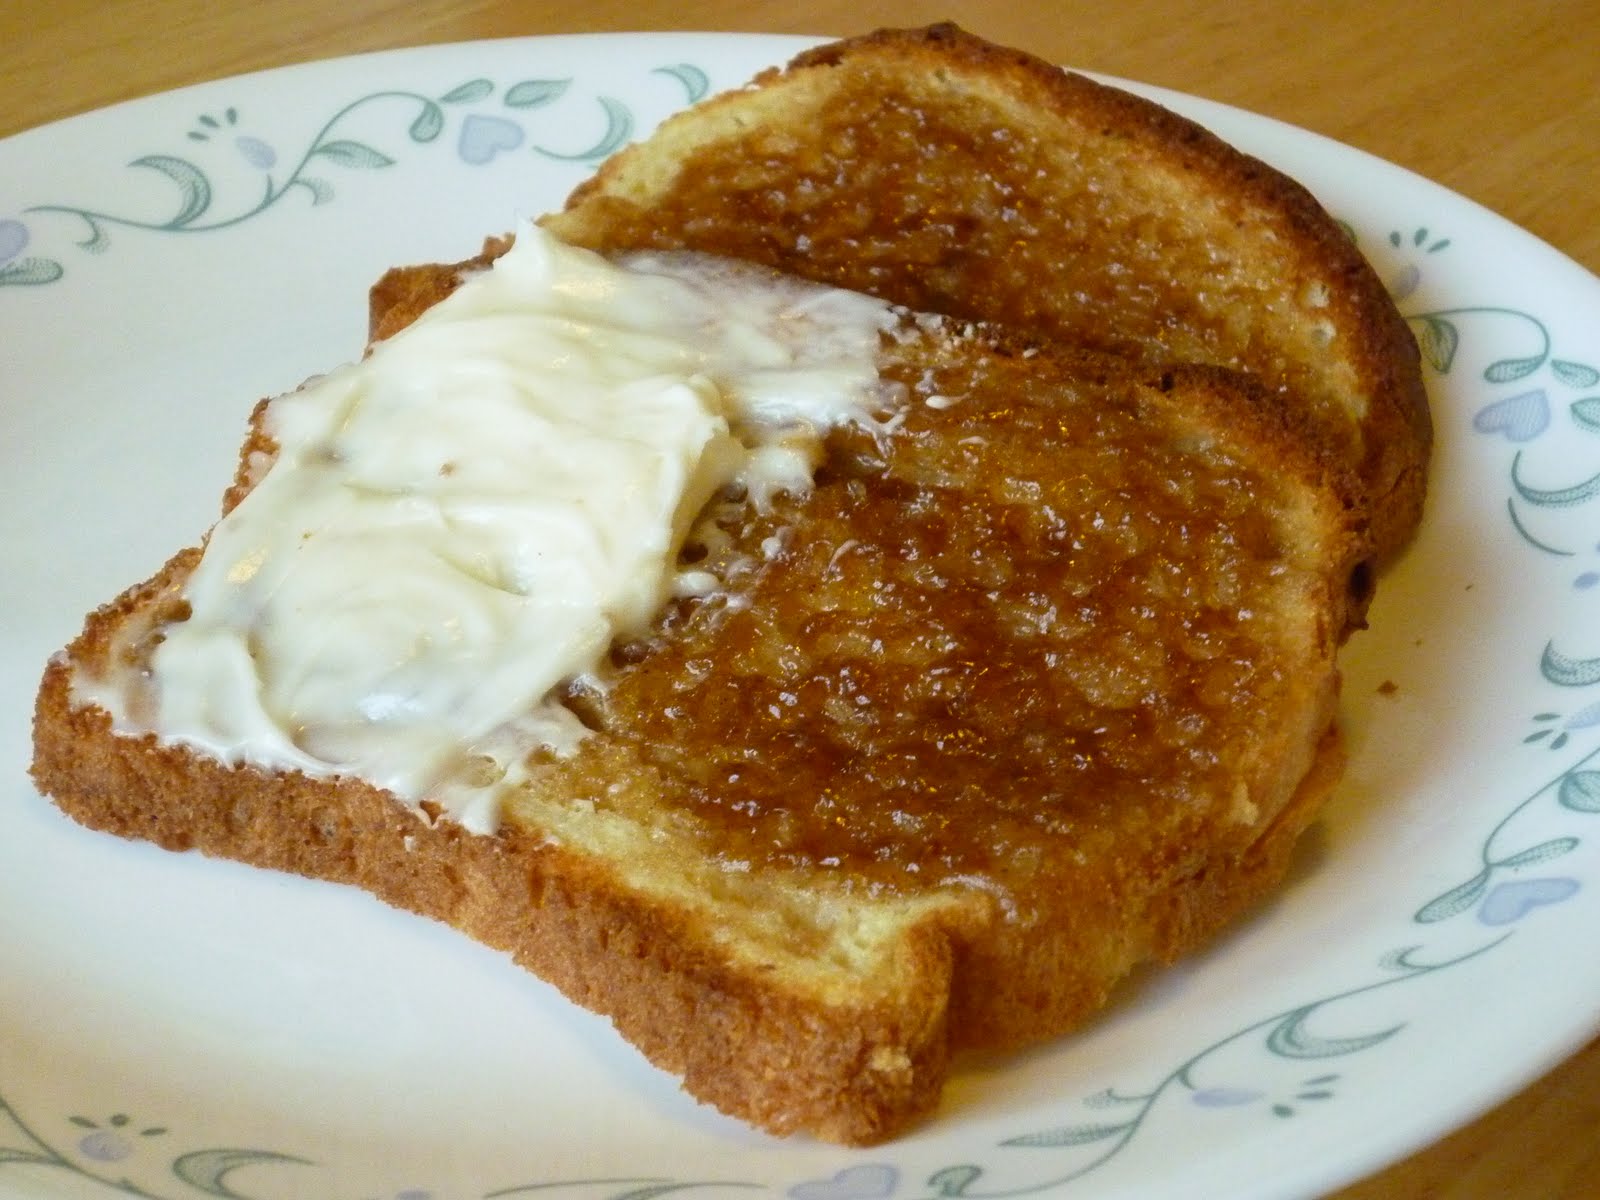
Serve with powdered sugar, jam, or syrup.

Wednesday, September 15, 2010

Gluten Free Oreos!


Anybody miss me? You know, as the end of the school year approaches, I always think to myself: "At last I'll be able to get some stuff done!" But, somehow, summer has escaped from me, and I haven't accomplished ANY of the things I thought I would. Well, that's not strictly true. I:

1. Did an awful lot of laundry and worked to teach my children how to do the same.

2. Did even more cooking and worked to decrease my "Kitchen Control Freak" vibes so that my children could learn to do the same. (They made cookies all by themselves a couple of times, and I didn't have even one little heart attack!)

3. Took my children to swim lessons almost twice a week for two months. They all had a fabulous time, and one of them actually developed a beautiful forward crawl. It was good enough to earn her a "Ducky Pass" so that she could go down the water slides even though she's too short.

4. Had 20 - 25 family members living in my house for the 2 weeks surrounding my mom's family's reunion here in Utah. We made the kids sleep outside, but with only one shower available, we had to do a lot of creative scheduling to keep everyone clean!

You know, when it's written down like that, it doesn't look like much. But I swear I was running all summer long! Oh, and Kirsti and I also taught a couple of GF cooking classes at the Provo Macey's grocery store. We taught fair foods in August (funnel cake, mmmmmmm . . . ) and then last night we taught a "How to pack GF lunches" class that entailed an awful lot of desserts. (That's the most important part of a school lunch, right? The dessert? My children seem to think so, anyway!) I intended to post all the recipes . . . oh, ages ago. Better late than never, though, eh? So here they come, one post at a time!

Gluten Free Oreos

1 ¾ c. margarine
1 large pkg. instant chocolate pudding mix
1 ½ c. sugar
2 eggs
2 tsp. vanilla
3 c. featherlight mix
1 c. GF mix
¾ c. dutch processed cocoa powder*
1 ¾ tsp. xanthan gum
¾ tsp. baking powder
1/3 tsp. salt

Cream margarine, pudding mix, and sugar. Add eggs one at a time, beating well after each. Add vanilla. Combine dry ingredients and add to creamed mixture. Chill about 1 hour.

Dust a clean surface with potato starch. Roll dough out about 1/8 inch thick, adding enough potato starch to make the dough less sticky. Cut with a small round cookie cutter (1 ¾ inch in diameter). Bake at 350° for about 10 minutes. Remove from cookie sheet and allow to cool.

*Dutch processed cocoa is cocoa that has been processed with alkalai. It is much darker and has a deeper chocolate flavor than natural cocoa. If you can't find straight dutched cocoa, Hershey's sells a "Special Dark" variety of cocoa that is a blend of natural and dutched cocoas. These cookies just don't taste right without the dutched cocoa.

Filling

3 ¾ c. powdered sugar
1 ½ Tbs. granulated sugar
½ tsp. vanilla
½ c. vegetable shortening
2 Tbs. hot water

Combine all filling ingredients and beat until smooth. Roll 1 – 2 teaspoons of filling into a ball. Gently squish the ball of filling between 2 cookies. Store in a closed container.

Enjoy!

Monday, August 2, 2010

A tale of two conversations . . .

So, I'm in the middle of a family reunion. It's a lot of fun, but a little chaotic. My immediate family (along with their children) are almost all staying in my home. (Altogether, there are 19 people staying here.) This has created some confusion - mostly in my mind. The other day I asked my sister to get out the ranch dressing and sour cream. When I turned around, she was washing lettuce.

"What are you doing?" I asked.

She looked at me as though I had lost my mind. "Washing the lettuce, like you asked me to."

Everyone agreed that I had asked Kate to get out the lettuce. I just sighed and admitted that I've partially lost it. So, when THIS conversation took place, I wondered (for a while) if I'd finally gone completely round the bend:

Me: "Where are the rest of the eggs?" (I'd purchased 3 dozen, but many of them had broken when they'd been shoved off the table!)

11 year old: "You told Maggie to put them in the freezer."
Me: "What?!? No I didn't!"
11 year old: "Yes, you did!"
Me (to my oldest sister, who was coming up the stairs): "Where are the eggs?"
Big Sis: "You told Maggie to put them in the freezer."
Me: "AAAAGGGGGHHHHHH!"

We eventually determined that THIS is what happened: My mom called to ask if she could bring home a bunch of meat and put it in my fridge. I said: "There's no room in the fridge. You'll have to put it in the freezer." I was a little hassled at the time, and didn't realize that the following conversation was going on around me:

Maggie: "Where should I put the rest of these unbroken eggs?"
Me: (on the phone, TO MY MOM) "There's no room in the fridge. You'll have to put it in the freezer."
Maggie: "I'm not going to do that."
Big Sis: "You'd better do what she says. If she tells you to put them in the freezer, she means it."

This whole situation inspired quite a lot of (slightly hysterical) laughter. Fortunately (as I was in the middle of making 3 different cakes) I had two dozen more eggs.

Ah, family life!

Friday, July 2, 2010

Strawberry Limeade


I lived in the Bay Area of California for several years while I was growing up, and we had a lemon tree in our backyard. Ever since then, one of my favorite summertime drinks has been fresh squeezed lemonade. More recently, I've added fresh limeade to my list of favorites. I bought an electric citrus juicer at Wal-Mart for about $10, which makes juicing limes and lemons so easy that making either drink takes just minutes. The other day we made strawberry limeade for dinner, and boy, was it good!

Strawberry Limeade

1 1/2 c. fresh squeezed lime juice
1 1/2 c. sugar
6 c. water
2 - 3 c. fresh strawberries, rinsed and with caps and stems removed

Combine lime juice, 1 c. sugar, and water in a 1/2 gallon pitcher. Stir. Combine strawberries and 1/2 c. sugar in a blender. Puree well. Pour berry puree into limeade. Stir well. Serve.

*If you don't want to add the strawberries, just add all the sugar to the lime juice and water. Or, to make lemonade, substitute lemon juice for the lime juice.

Saturday, June 19, 2010

Summertime, and the living is easy . . .

School's out, it hasn't snowed for almost a month, and sprinkler-running children are beginning to make a regular appearance in the neighborhood. All of which means that my cooking is drifting towards summer-related foods. In our last class, we demonstrated a tres leches cake recipe. There were lots of "oooooohs" and "aaaaaahs". Just this last Monday, I took the same cake to a family barbeque, and my in-laws' in-laws requested the recipe. It's a cool kind of a cake, needing to be refrigerated for long-term storage, but there is seldom any need to store it long term. :) It's taken me a while to post a picture, because I have seldome been able to find the camera before the cake is gone!


Tres Leches Cake

2 c. sugar
1 1/2 c. featherlight mix
1/2 c. GF mix
1 tsp. xanthan gum
2 tsp. baking powder
6 large eggs
1/2 c. milk
1 tsp. vanilla

Topping:

1 can evaporated milk
1 can sweetened condensed milk
1 c. milk (or cream)

Place all dry ingredients in the bowl of a stand mixer. Add eggs, milk, and vanilla. Mix together on low speed, scraping the sides of the bowl to make sure all the flour gets mixed it. Using the whisk attachment, beat the cake batter on high speed for about 5 minutes. Pour into a greased 9x13 pan. Bake at 350 degrees for 30 - 35 minutes. My cakes have always had a slight dip towards the center . . . but it'll be covered with cool whip later, so don't worry about it.

While the cake is baking, blend together the topping ingredients. Store the topping in the fridge until the cake is done. Pour half of the topping over the warm cake, using a spoon to spread it across the surface of the cake until it has all soaked in. (Most of it will probably soak into the middle, but you want to do your best to help it soak in evenly over the whole cake. You may poke small holes in the top of the cake with a toothpick to aid in absorption if you want, but it's not necessary.) Return the remainder of the topping to the fridge. (Stick the cake in there, too, if you've got room.)


As you can see, the topping soaks into the cake quite well. So don't worry that it won't all fit in . . . it will!

Once the cake is cool, slowly pour the rest of the topping over the cake. (I pour topping on one side of the cake at a time, tilting the pan to ensure that the topping doesn't just all slip right back to the middle of the cake. The goal is to ensure that the whole cake is moistened with the milk topping.) Once all the topping has been absorbed by the cake, cover the cake with Cool Whip (or real whipped cream if you have it). Garnish it with fresh sliced fruit such as strawberries and kiwi, if you like. Then return it to the fridge until ready to serve. (It's really good after it's been in the fridge for 2 hours or so.)

Monday, May 24, 2010

How to Play Snow Football


1. Wake up. (Your spouse should do this by mentioning that it has started to snow.)

2. Tell your 11 year old that it will stop snowing in 20 minutes.This will (falsely) reassure her that the 6th grader/teacher kickball game will occur as scheduled.

3. An hour and a half later, realize that it has not stopped snowing. Look at the children's picnic table. See 2 inches of heavy,wet snow.

4. Look at your fruit trees. Think about how sad you were when a late storm snapped the branches on your (then) new apricot tree 2 years ago. (Don't bother thinking about how the same storm snapped a branch on the front yard maple, causing it to fall on your sister's car. All that is no more than water under the bridge.)

5. Decide to go shake the fruit trees off.

6. Put on a coat. (This is important. Snow will fall on you.) Put on your gloves. (This is not so important. Snow will melt all over them and into them, and they will soon be very, very wet. And so will your hands.)

7. Shake off the fruit trees.

8. Decide to shake off the front yard maple.

9. Realize that the front yard maple is very old and very, very big.There is no way you can shake the trunk and, even burdened with snow as they are, all but 1 of the branches are out of your reach.

10. Go downstairs. Get a football. (Also a small, light-weight basketball that is about 5 inches in diameter, if you have one.)

11. Take the ball(s) outside. Throw them at the tree. Knock down very little snow.

12. Look at the neighbor's maple. It is smaller than yours, but it's leaves are a lot bigger (it's a Norway maple, and yours is a Silver maple). Go shake the snow off your neighbor's tree. Consider this half-time.

13. Start throwing the football at the tree again. You will feel silliest if you throw it up underhanded, closing your eyes and hoping for the best. It will usually miss the tree completely. But if you look up while throwing, you will invariably get a bunch of snow in your face.

14. Decide that you have done your best. Go into the house and start writing about how to play snow football.

15. Hear the fireworks celebrating the other team's win. Realize immediately that the cracking noises you hear are not fireworks, but the sound of maple branches falling onto YOUR car.

16. *Sigh* Remember why you don't like this game very much.

17. Go outside 30 minutes later and do it all again. Time for some cocoa. And some Russian Tea Cake cookies wouldn't come amiss, either.

Wednesday, April 28, 2010

Black and White Cookies . . . almost

My little sister spent last summer in New York City. She brought back a Black and White cookie for me. It was very good - a soft, cakey cookie with vanilla and dark chocolate fondant covering it. I decided that I ought to make a gluten free version.

Tonight, I tried it. While they weren't "Gag me with a spoon" awful, they were certainly nothing to write home about. They were just kind of - there. Certainly nothing worth breaking a diet for . . . in the end, no more than super-empty carbs. I won't post the recipe. But I'll try again someday and see if I can make them post-worthy.

Wednesday, April 21, 2010

Cowboy Monster Cookies


It's raining in my backyard today. The new shoots on the raspberry bushes are dripping, there are occasional flashes of lightning, and it's about 10 degrees cooler than it was yesterday. Obviously, today was the day to try a new cookie recipe.

My neighbor has a recipe called "Monster Cookies" that called for no flour, and I thought I would try them. They did, however call for 18 cups of oats . . . . and WHOA! that's a lot of expensive gluten free oats to put into cookies. So I decided to combine my "Cowboy Cookie" recipe with her "Monster Cookie" recipe . . . yummy deliciousness resulted. Peanut butter, oats, and chocolate chips make a lovely rainy day treat . . . or any day, really.

Cowboy Monster Cookies

1/2 c. butter
1 c. white sugar
1 c. brown sugar
2 eggs
1/2 tsp. vanilla
1 c. creamy peanut butter
1/2 tsp. salt
1 tsp. baking soda
1/2 tsp. baking powder
1 tsp. xanthan gum
1 1/2 c. featherlight mix
1/2 c. GF mix
2 c. GF rolled oats
1 c. chocolate chips

Cream butter and sugars. Beat in eggs and vanilla, then peanut butter. Add salt, baking soda, baking powder, xanthan gum, and flour mixes, and mix well. Mix in oats, then chocolate chips. (The chocolate chips don't mix into the cookie dough as well when there is peanut butter in the recipe . . . the oil from the peanut butter makes them want to slip out of the dough. Just mix them in as well as you can so that you don't end up with half of your cookies lacking chocolate chips.)


Roll in 1 inch balls, and place on a 13x18 cookie sheet. Press down slightly . . . don't use a fork, just smoosh 'em a bit with your fingers. Bake at 350 degrees for 10 minutes. Cool and enjoy!

Friday, April 16, 2010

Chili


All right. I hated that last picture so much that I decided I had better replace it with a new post. These pictures strike me as marginally better, but I think that afternoon is just not the best time for picture taking in my kitchen. I guess I'll have to start making dinner earlier!

Tonight we are having Frito Banditos for dinner. At least, that's what my family calls them. Some of my relatives call it Frito Pie, I've heard it called Walking Tacos . . . well, I'm sure that there are dozens of things it has been called. What it means is: We're eating chili on top of Frito-type corn chips, topped with lettuce, tomato, cucumber, and cheese. And, before you complain that cucumbers have no business on anything resembling tacos, let me inform you that I LOVE cucumbers on tacos, and you really ought to try it.

And now . . . the chili recipe!

Chili

1 - 1 1/2 lb. hamburger
1/2 diced onion (or use a TBS or two of dehydrated onions)
salt and pepper
3 cans tomato sauce
2 cans diced tomatoes (I love the petite diced tomatoes . . . not sure why)
1 4 oz. can diced green chilis
1 1/2 tsp. cumin*
2 cans pinto beans, drained and rinsed**
1 can refried beans (optional)
1 16 oz. bag frozen corn

Sautee burger, onion, and salt and pepper until browned. Drain grease. (I usually cook 5 or 6 lbs. of burger at a time, add enough tomato sauce to make it all red but not liquidy (about 1 sm. can per lb of burger), then freeze it in ziplock bags containing 1 or 1 1/2 lbs of burger apiece. That way I only have to defrost it and dump it in to my recipes, instead of spending the time to cook 1 lb. of burger at a time.) Place burger in a large pot. Add the rest of the ingredients. Heat through.

Great on it's own, as Frito Banditos, over home baked oven fries (or even store bought fries), or over hot dogs.

*Add more cumin if you like. I'm having a hard time judging the correct amount of spices tonight because of clogged sinuses . . . nothing smells or even tastes like anything!
**This recipe is also really good with home cooked black beans, too.


Ham and Lentil Soup


I had to remove the picture. It grossed me out every time I looked at it, and I actually know how good the soup tasted! It was dinnertime when I pulled out the camera, and the evening light wasn't really good enough to get the picture I wanted. The soup, however, was definitely good enough . . . I was lucky to have enough available for picture taking!

I've never cooked with lentils before, but I've been wanting to for quite some time. They make a good food storage item because, like beans, they are a good source of protein. Not only that, they are naturally gluten free, which is always a bonus. This soup really doesn't require any strange ingredients to make it gluten free. I really enjoyed it, and it appears that the rest of the family did, too, because there are no leftovers!

Ham and Lentil Soup

1 meaty ham bone (mine is usually left over from a spiral cut ham hock or butt)
6 c. water
1/4 tsp. poultry seasoning
salt and pepper
1 pinch tarragon (optional)
1 c. lentils, rinsed and drained
1 c. carrots, cut into disks (peel 'em first)
1 c. peas (optional)
1 c. cauliflower florets (cut them pretty small)
1 c. corn

Cut most of the meat off the ham bone and dice it into small pieces. Place ham pieces and ham bone in a medium-large pot, then add water, salt and pepper, poultry seasoning, and tarragon (if desired). Bring to a boil, then reduce heat to medium and boil for about 15 minutes. Add vegetables and lentils, and return to a simmering boil. Simmer, covered, for about 25 minutes, or until lentils and veggies are soft. Add enough water, if necessary, to make the soup soup-like again. (Lentils absorb a lot of water. I think I added 1 or 1 1/2 c. of water.) Enjoy!

Wednesday, April 14, 2010

Citrus Pound Cake


Strawberries have been available for about a dollar a pound for a few weeks now. They always smell so sweet and summery when I walk by them . . . so I buy some. And then, of course, I have to make angel food cake or pound cake to go with them! This particular recipe has been passed from one friend, through another friend, to me. The friend before me changed it a bit, and I changed it again, then I made it gluten free. It's really good . . . especially with strawberries!

Citrus Pound Cake

1 1/2 c. butter, at room temperature
zest from one lime and zest from half an orange*
1 package (8 oz) cream cheese, at room temperature
3 cups sugar
6 large eggs
1 1/2 teaspoons vanilla
juice of half an orange
juice of one lime
2 1/4 c. featherlight mix
3/4 c. GF mix
1 1/2 tsp. xanthan gum
1 teaspoon salt


Preheat oven to 325°F. Line 2 or 3 loaf pans with parchment paper. (I really like parchment paper. It allows me to remove things from the pans so easily. If you don't have any, however, a non-stick cooking spray should do the trick. Or you can lightly grease the pan with either butter or shortening, then dust it with featherlight mix.)

Cream butter and cream cheese until smooth. Add the sugar and zest, then beat on high speed for 3 to 5 minutes, "until light and airy" my original recipe said. Add the eggs one at a time, beating after each addition and scraping down the sides of the bowl with a rubber spatula as needed. (Adding the eggs slowly like this allows them to mix evenly into the butter mixture, without leaving clumps of butter that are didn't mix in well.) Add the vanilla and citrus juices, and mix well. Then add the flours, xanthan gum, and salt all at once. Mix until well blended.

Pour the batter into the prepared pans and shake lightly to even out the top. Bake until the cake is golden brown and a toothpick inserted in the cake comes out clean, about 1 hour and 15 minutes. Allow the cake to cool in the pan for at least 20 minutes. (I left mine in the pans for hours . . . until I went to bed that night.) Allow to cool completely before serving. Cover leftovers tightly. (I kept mine in a ziplock bag overnight.)

This cake is good on the first day, but it is REALLY good after it's been allowed to sit for a while. I'd suggest making it 8 - 24 hours before you want to serve it. If you forget to make it early, though, it's not the end of the world. It tastes good, just an hour out of the oven - it's mostly the texture that improves with time.


*I used a fine cheese grater to "zest" the lime and orange, because I don't own a zester. The thing to remember is that you want the colored part of the peel, but not the white part underneath it. Once you are done zesting them, the fruit peels will look like pale copies of their former selves. Then you can juice the fruits for later in the recipe!

Friday, April 9, 2010

Quiche


Quiche has a bad name. I've heard all sorts of things about it, like "Real men don't eat quiche," and "Real moms don't make quiche." Well, that's hooey. Quiche is very easy to make, and it's delicious. I usually make my quiche without a crust because it's faster, but I do have a gluten free pie crust that I love. When I want to be fancy, that's what I use. Most of the time, though, I throw some parchment paper in the pan, pour the quiche in, and bake it. It's easy.

I took this to a Neighborhood Easter Egg Hunt and Potluck Breakfast this last weekend, and received LOTS of compliments. One mom told me: "I'm so impressed. I couldn't make this." Well, I'm sure she could. Quiche is very forgiving. You can add a little less or more of any of the ingredients and still come out with a great quiche. You can add spinach or shredded carrots or leave out the onions or use ham or even chicken instead of bacon, and you'll still come out with a great quiche. Try it!

Quiche - Gluten Free, Easy, and Delicious!

1/2 c. diced bell peppers
1/4 c. diced onions
1/4 - 1/2 lb. bacon
6 eggs
1/2 c. sour cream
1/2 c. cottage cheese
1/2 c. shredded cheese (I use a 4 cheese blend from Costco)
salt and pepper

Preheat oven to 350 degrees. Sautee peppers. (Don't they look yummy? And if we had Wonka-vision, they would smell yummy, too.)


Cut bacon into 1/4 inch pieces (I do this with my kitchen shears), then cook it until it's crispy. (No picture . . . but it also smells yummy!) Allow bacon to cool on paper towels, to absorb most of the bacon grease.

In a medium bowl, beat eggs with a whisk. Add sour cream and mix well - enough to eliminate any big lumps of sour cream. Stir in cottage cheese, shredded cheese, some salt and pepper, and the cooked bacon and peppers.

Line 2 pie plates with parchment paper. Pour the egg mixture into the two pans, trying to split the solid bits (like peppers and bacon) evenly between the 2 pans. (When I double the recipe, I split the egg mixture between a pie plate and a 9x13 pan.)

Bake at 350 degrees for about 30 minutes. Remove from the oven, cut, and enjoy!


Thursday, April 8, 2010

Puffy Oven Pancake


This morning's Special Request was Puffy Oven Pancake. This is one of my family's favorite special breakfasts. I especially like the higher protein content provided by the eggs and nuts, which means that I feel full for longer than half an hour. This recipe really works best with Featherlight mix. I've tried it with other flour mixes and just haven't liked it as well. I almost always make a double batch, because my family of 6 easily polishes off two 9x13 pans.


Puffy Oven Pancake

1 c. featherlight mix
1/2 tsp xanthan gum
1/4 c. sugar
1/2 tsp salt
1 c. milk
4 eggs beaten
2 Tbs. margarine or butter
1/4 tsp. cinnamon
1 (16 oz) can sliced peaches, diced
1/4 c. chopped pecans


Heat over to 425 degrees.

Mix together featherlight mix, xanthan gum, sugar, and salt. Combine milk and eggs, and slowly whisk into dry ingredients. (I usually add enough milk/egg mix to form a thick batter, beat it well, then add more milk/egg. This gives me a smooth batter without any lumps.) Place margarine in a 9x13 pan. Melt in hot oven until margarine is sizzling (about 3 minutes). Remove pan from oven. Tilt to spread margarine over the entire bottom of the pan. Immediately pour batter into the hot pan. Sprinkle with cinnamon, then top with diced peaches and pecans.

Return pan to oven. Bake for 16-20 minutes, until golden brown. Pancake puffs up a lot while cooking, but almost always falls once it's out of the oven. Serve with syrup or cream.


This is the pan just before removal from the oven.


This is the same pan, after being removed from the oven. You can see that the edges of the pancake are 1/2 - 1 inch shorter after removal from the oven. It's shorter, but no less yummy!

Wednesday, April 7, 2010

"Cinnamon Roll" Bread


This weekend I was making Sunday Morning Breakfast Cake, one of my mother-in-law's recipes (modified to be gluten free, of course). The topping is a combination of butter, brown sugar, and nuts, and as I was spreading it on the cake, I started to think about cinnamon rolls again. The pull-aparts, while yummy, do require a bit of prep work . . . too much to do on a daily basis. I decided to see if I could create a spreadable "cinnamon roll" topping that could be enjoyed anytime. It doesn't taste exactly like cinnamon rolls (my husband says it's not quite gooey enough), but it is very good. In fact, one of my 5 year olds just came up to me, saw the photo, and said: "Mom, will you make some of that for me again this morning?" Of course I will!

"Cinnamon Roll" Bread

1/2 c. butter or margarine, softened
1 1/3 c. brown sugar
1 tsp. cinnamon
cream cheese frosting, optional

Combine butter, brown sugar, and cinnamon. Mix well. (I just used my hands to mix it together, but you could use a mixer.) Spread on slices of bread*. Place topped bread on a cookie sheet, then broil until bubbly. (When using the broiler, don't walk away from the oven. You only need to broil it for 1 - 3 minutes, and you will be happiest if you stay and watch your food the whole time. I'm always immensely irritated with myself when I burn something that would have been delicious if only I'd watched it!)

You can top the bread with cream cheese frosting, if you want, or eat it straight out of the oven. Either way, it's yummy! Keep extra spread in the refrigerator. Microwave cold spread for 10 - 15 seconds to make it spreadable again.

*I always keep my gluten free bread in the fridge or freezer. Then, before using it, I reheat it in the microwave until it's soft and warm. This takes about 10 seconds. Once the bread is reheated, it's as pliable as newly made bread.

Tuesday, April 6, 2010

Pumpkin Pancakes


Pancakes and waffles are one of the first foods I recommend to new gluten free cooks. The batter is easy to make, and they freeze and reheat well. They're great for peanut butter sandwiches, too. Besides which, it's easy to vary the recipe. This particular variation is one that my neighbor shared with me. The ones she brought me were full of wheat, but I was easily able to modify my own pancake recipe to re-create the delicious flavor.

Pumpkin Pancakes

1 1/2 c. Featherlight mix
1/2 c. GF mix
1/2 tsp. xanthan gum
½ tsp. salt
1 Tbs. baking powder
¼ c. sugar
¼ c. brown sugar
1 Tbs. cinnamon
3 dashes mace
3 eggs
1 ¾ c. milk
½ c. oil
1 c. pumpkin
¼ - ½ c. semi-sweet chocolate chips

Combine dry ingredients in a large bowl. In another bowl, combine eggs, milk, oil, and pumpkin. Add to dry ingredients and mix well (there should be few, if any, lumps). Stir in chocolate chips. Cook on a hot griddle until bubbles appear on the surface of the pancakes. Flip and cook on the other side. Leftover pancakes may be refrigerated (or frozen) and reheated in the microwave.


Monday, April 5, 2010

Cinnamon Pull Aparts


First of all . . . you will note the return of pictures! I will not re-tell the camera story now, because I do not have the time to calm myself back down. I will simply say: "Panasonic has NO customer service skills. But I fixed the camera despite them." Sheesh.

So. Spring Break, for me, means time to make fun gluten free breakfast things. I'm going to try to post a fun breakfast recipe every day this week. Considering my track record, though, I make NO guarantees!

About a month ago, I bought a small loaf of cinnamon pull-aparts from a local bakery. I've tried making them gluten free in the past, but the bread batter is so sticky that it was more hassle than it was worth. Well, as I stared at this little loaf of bread, I started thinking about the prepurchased frozen bread dough balls that are sold in grocery stores, and wondered: "Why can't I do that?" Coming up with no good arguments against, I decided to try it. And . . . it worked! One of my 5 year olds helped me make the pull aparts, and there was very little mess to clean up. Definitely a repeater!

Cinnamon Pull Aparts

1/2 a recipe of Gluten Free Bread batter, balled and frozen *
1/2 c. butter or margarine, melted
1 c. white sugar
1 tsp. cinnamon

Combine sugar and cinnamon in a small bowl. Melt butter in another small bowl. Line one large bread pan or several small bread pans with parchment paper. (This keeps the cinnamon sugar from burning onto the pan.) Roll each ball of frozen dough in butter, then in cinnamon sugar. Place into the pan(s). Preheat oven to 350 degrees. Allow pull-aparts to rise while the oven heats. Bake pull-aparts at 350 for about 40 minutes. Top with cream cheese frosting.


*Each recipe of my White Sandwich Bread makes 2 loaves of bread. To make pull-aparts, make a batch of bread, but just bake one loaf. Scoop the remaining bread batter onto a parchment-paper-lined cookie sheet using a small cookie scooper or 2 spoons. Stick the cookie sheet in the freezer. You can keep the frozen balls of dough in the freezer for quite a while, though if you want to put off using them for a long time, you might want to transfer them to a re-sealable bag so they don’t freezer burn.

Saturday, April 3, 2010

Cream Cheese Frosting

This is my favorite frosting recipe. I use it for cinnamon rolls, carrot cake, graham cracker cookies . . . just about everything that calls for frosting, actually.

Cream Cheese Frosting

1 8 oz. block of cream cheese
1/2 c. butter or margarine
1 lb. powdered sugar
1 tsp. vanilla

Cream together butter and cream cheese. When well blended, mix in powdered sugar. Add vanilla. Keep leftover frosting in the refrigerator.

Wednesday, February 3, 2010

Black Beans

Oh, my. Life is busy. But, more importantly, my camera broke. So I don't have any beautiful pictures to post. But I feel guilty for neglecting the blog . . . so I'm posting picture-less.

Last summer I decided that it was time to add more beans to our diet . . . because groceries just keep getting more and more expensive, darn it! And my kids are just going to keep growing, which will make the grocery bill grow, too, and so I informed my children (on the way home from our family reunion) that we would be eating beans every evening from then on. My 10 year old was rather leery of the whole plan (everyone else just kind of ignored me), but I've trained them to believe that complaining about my cooking makes me (and, by extension, them) unhappy, so all I got was a semi-reluctant "Okay." After the first bite, though, she told me: "I don't think I'm going to mind eating beans every night!"

Most of the credit for this recipe goes to my neighbor, but I did change some of the spices to suit my own tastes. Feel free to re-adjust them to suit your own likes and dislikes!

Black Beans

4 c. black beans
lots of water
salt
onion powder
chili powder
cumin
5 or 6 quart crock pot *

Rinse the beans and pick out any rocks or things that may have escaped the manufacturer's sorting process. (I've never yet found a rock in my beans, but Wal-Mart felt impelled to warn me about the possibility of rocks, and so I'm passing the warning on!) Place the beans in the crock pot, then fill it up to the top with hot water - about 16 - 20 cups. Add about a teaspoon of salt, put the lid on, and turn it on Low. Let it go all night long. (LOTS of hard work, I know, but it's worth it!)

The next morning, drain and rinse the beans. (DON'T put cold water in your hot crock, though, as it will probably break, and then where will you be? Use hot water instead.) Return the beans to the crock pot, and add enough water to just cover the beans. Sprinkle spices on top (I use about 1 tsp. of salt, 1 tsp. onion powder, 2 - 3 tsp. chili powder, and 1/2 tsp. cumin), then turn it on high. Let it go all day long. (You can stir it occasionally if you are home, but don't worry about it if you're not.)

Serve with corn tortillas and rice. Also yummy in black bean salsa, chef's salad, and chili (recipes forthcoming).

By the way, you may not want to start off with eating them every single night. Beans can cause some . . . hmmmmm . . . intestinal distress (if you aren't used to eating them). Rinsing the beans in the morning helps alleviate some of that, but it won't stop all of it.

* My mother has a crock pot that apparently thinks it's true calling in life was to be a real oven. If your crock pot cooks as quickly as hers does, adjust your cooking times . . . perhaps cutting them in half.